Shop Duck Duck Wool

Where was that?
Updates

Enter your email address:

Delivered by FeedBurner

Look around
Pumpkins One, Two, and Three (and Me)

when I started the blog...

and a few years in...

and now...

3pumpkinslittle on Instagram 


Entries in crafts (117)

Monday
Aug312009

More t-shirt embellishing.

Our oldest, Max, started first grade a few weeks ago.  And according to him, it's much different than kindergarten.  Every day when he gets home, he tells me it is really, really hard--the reading, the writing workshops, the lack of snack time, so on.  Max generally handles whatever is thrown his way, so I'm surprised to see his new routine wipe him out each day.  Often, he collapses and curls up on the couch for a few minutes as I get his snack ready.  He always asks for one thing as he decompresses--his stuffed dog, Clifford.  Clifford joined our family when Max was a baby and it quickly became his lovie.  And although Max is in a proud "I'm a big boy, not a baby!" stage, he has not outgrown Clifford.  He even gave Clifford a family--two baby Clifford children and another stuffed puppy for a wife.  Here is a picture Clifford "took" of Max and Clifford's family after Clifford's wedding.  Yes, there were invitations.  And yes, I did the flowers.


Max's kindergarten teacher let the kids bring in special items to make the transition easier, so it was not uncommon for Clifford to hitch a ride to school in Max's backpack.  But so far, there has not been an opportunity for Clifford to check out first grade.  And I can assure you that Max is not going to suggest it because he thinks you don't do such a thing in first grade.

So, I took a red t-shirt that I picked up because I liked its weathered, washed finish, and machine stitched a familiar image onto it.  This way, Max can at least take Clifford's likeness to school on any day he should want his faithful friend by his side.  It makes us both smile.

I used my phone-book paper method, so see my previous post for a full tutorial.  But in a nutshell, I traced Clifford's outline onto a sheet of phone-book paper.  I pinned my paper onto the t-shirt, which was reinforced with some lightweight adhesive stabilizer underneath (because the fabric was super stretchy).  I machine stitched a straight line (using a short stitch to perforate the paper) following my tracing.  I ripped off the paper and then went back over the stitches with a tight zig-zag (I found if I zig-zagged directly onto the paper, it caught too much paper within the stitches).  I used black fabric paint to fill in Clifford's eyes and collar.  And as I post this picture, I see that I forgot to fill in his nose so off I go to remedy that.   

Wednesday
Aug262009

Tutorial: Reverse applique using recycled phone book pages.


I'm a big fan of reverse applique--it's so fast and easy.  Usually I trace an image onto my outer fabric using a water-soluble pen, but when I'm altering a dark fabric, it's hard to see any markings.  So on dark fabrics, I usually make a paper template of the image, pin it to the outer fabric, and stitch around it.  But sometimes that doesn't work too well--it can be hard to negotiate around fairly intricate shapes even if you do pin down all the edges.

Last week, Leo and I decided to embellish some plain tees and we didn't get around to making them until the very end of Will's nap.  Trying to save time, I decided to just stitch right onto my printed image (rather than cutting it out beforehand) then rip away the paper--sort of like paper piecing on a temporary foundation if you've ever done that in quilting.  My first attempt was okay, but I used plain computer paper and discovered it was too thick, leaving too many bits of paper caught in the stitches. 

So, on my hunt to find a thinner paper (but not use up my precious tear-away stabilizer stash), I came across an old phonebook destined for the recycling bin.

Pages from it worked great--the paper tore away nice and clean.  But there are a few things to note.  I keep a needle set aside to use on paper only.  Sewing through paper really dulls a needle, so although I know you should use a ball-point needle on knits, I end up using whatever my "paper" needle is at the time (I'm usually altering what would otherwise be donated, stained tees, so I don't fuss around too much and just dive in).  Make sure to use a fairly short stitch as it will help to perforate the paper, making it tear away easily.  Also, I rubbed my finger on the phonebook page to make sure that the ink wouldn't rub off like crazy.  It didn't.  But still, this might not be the best medium to use if altering a light colored garment.

You will need:

Clothing to alter

Desired image traced onto thin paper like phone book pages

Contrast scrap of fabric larger than your image

Straight pins

Sewing machine

For inspiration, I usually do a Google image search for whatever it is that the boys would like on their shirt.  I then hand draw it onto the paper.  You could also trace it over a light box but since I don't have one, I am often found tracing against a window.  This time I traced a puzzle piece.


Be sure to use a color you can easily see.  I do not have a see-through sewing foot so I like to trace my image in bright red.   

 Pick out your contrast fabric and decide on where you want to place your applique. I often like to center them, but if it's your first time, you might want to pick an off-center spot so you don't have to worry about precise placement--a lower front corner always looks nice.    

Place your contrast fabric, right side up, beneath your desired applique spot.  Place your paper template on top, makiing sure the contrast fabric is beneath all of your traced lines.  Pin, catching all three layers:  your paper, the garment, and the contrast fabric.

Set a short stitch length on your machine to really perforate the paper to make it tear away easily.  Stitch directly onto your 'sandwich' following the outline of your image, removing pins as necessary.  Don't forget to backstitch at the start and finish.

Gently tear the paper, pulling away from the stitches, not across.    

Using small detail scissors, carefully cut away the top fabric to reveal the contrast fabric.  Cut close to the stitched line but you want to leave a little bit of the top fabric so your stitches don't pull through.

Your edges will look a little imperfect until you launder the garment.  After washing it, the knit fabric will curl back for a nice effect.

Trim the contrast fabric from the back.  I like to use pinking shears. 

Now give it to the patiently waiting munchkin to wear! Oh, and we did a rocket too.

Have fun!


Wednesday
Aug192009

A little sewing.


I'm not the best seamstress in the world and I'm not the worst.  I'd place my sewing skills squarely in the middle--not a novice at all but by no means an expert.  I am self-taught and have found that I'm pretty good at figuring things out.  And I'm loving this current bloggy craft movement where you can find a tutorial online for just about anything.  There are so many projects I want to try!

But last week I didn't attempt anything new.  I made some embellished burpers and a minky blanket for friends to give as gifts to new babies in their families.  I sometimes sell these on Etsy in my "shop" but I haven't listed anything in forever.  Maybe someday....


The burpers are just embellished with quilting cotton and ribbon at the bottom and I add a handcut applique over the machine-embroidered name (I have a small embroidery sewing machine which is fun).  The blanket is so snuggly.  I use super plush dot minky on one side and coordinating quilting cotton on the other.  I have yet to figure out the trick to working with minky!!!  It slips so much--and I even use a walking foot.  It always ends up a bit wonky but I think I'm the only one who can tell.  Please pass along any tips if you have them. 

I hope to do more sewing as the school year picks up.  It's one of my favorite things to do during any down time.  But right now, after the boys are in bed, I am tackling rooms and closets in the house on an organizing mission.  The older boys pretty much wrecked any systems I had in place before summer.  I love that they are getting to be so independent in getting out toys and craft supplies, but sheesh!  It comes at a price.  A messy, stacked-bins-defying-gravity price.  I am saving my craft room for last because it is the room that needs the most work--I let them loose in there to make some cards and now there are bits of this and that everywhere.  I plan to post "after" pictures.  And if I can stomach showing its current blitzed state, I'll even post "before" pictures...but I wouldn't count on it!


Sunday
Aug092009

Lolli-flop.


Well, as promised, I made Luxirare's pies-on-a-stick.  Hers looked amazing.  And delicious.  Mine?  Not so much.

I read her post carefully and was very happy to see edits with tips--and follow those tips I did.  But I still could not master a good filling-to-crust ratio (unless you count all the filling that escaped their little pie-pop homes, which I'm pretty sure you cannot).  I used fresh strawberries mixed with homemade jam, a combo that has faithfully worked for me in hand-pies.  Of course now that I stop and think about it, I am not surprised that the filling seeped everywhere when I attempted this here.  The hand-pies I make are rustic and hearty, with a folded side-seam to match, whereas these were supposed to be delicate gems balanced on a stick.  So now I know.

I think when I try again (because they are just too cute to end the story here) I will:  a)  use a thicker filling with cooked fruit (my fresh strawberry chunks were way too big so of course they let off a lot of juice) and b) use a sweeter crust--Martha's Pate Sucree or any other basic sweet crust that does not need to be prebaked should work nicely.  In fact, I'm pretty sure I've already eaten pate sucree straight up and thought to myself, "fruit?  Who needs fruit with this"--just in case my ratio is off yet again and I'm left with a dough-pop. 

Good luck if you give it a go--and I sure hope you do--and please, please pass along your tips and triumphs.  It obviously can be done and in fact done quite well, as Luxirare shows on her blog so beautifully.  Go there to be inspired.  Look below to be amused. 


Cheers,

Tuesday
Aug042009

Recycled windsock.

Today's "keeping it summer" craft was making a recycled waterproof windsock, courtesy of Valerie over on Frugal Family Fun Blog.  I love her ideas!  She also has a post on garden stones that we have planned for later--hopefully this weekend.

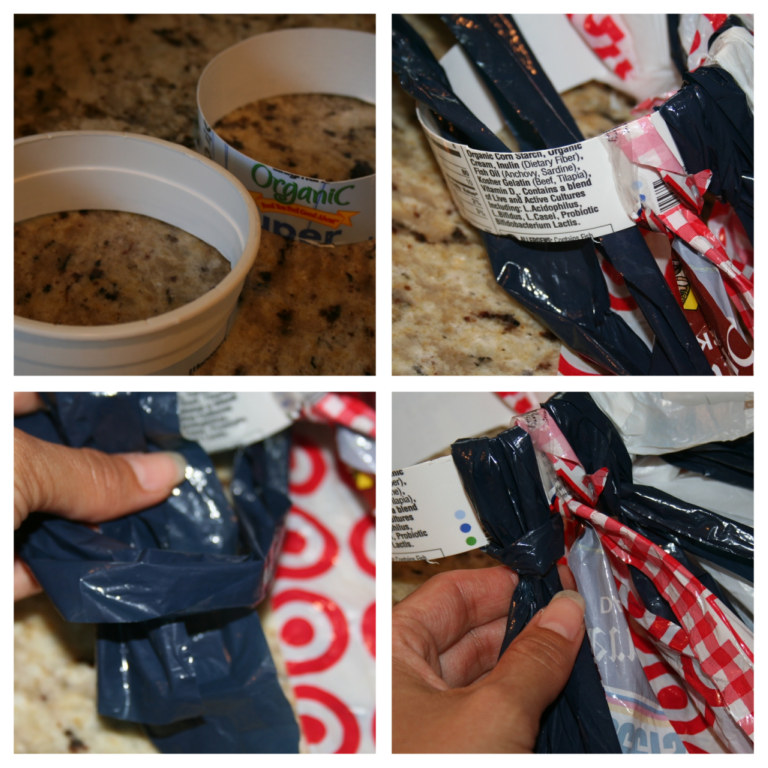
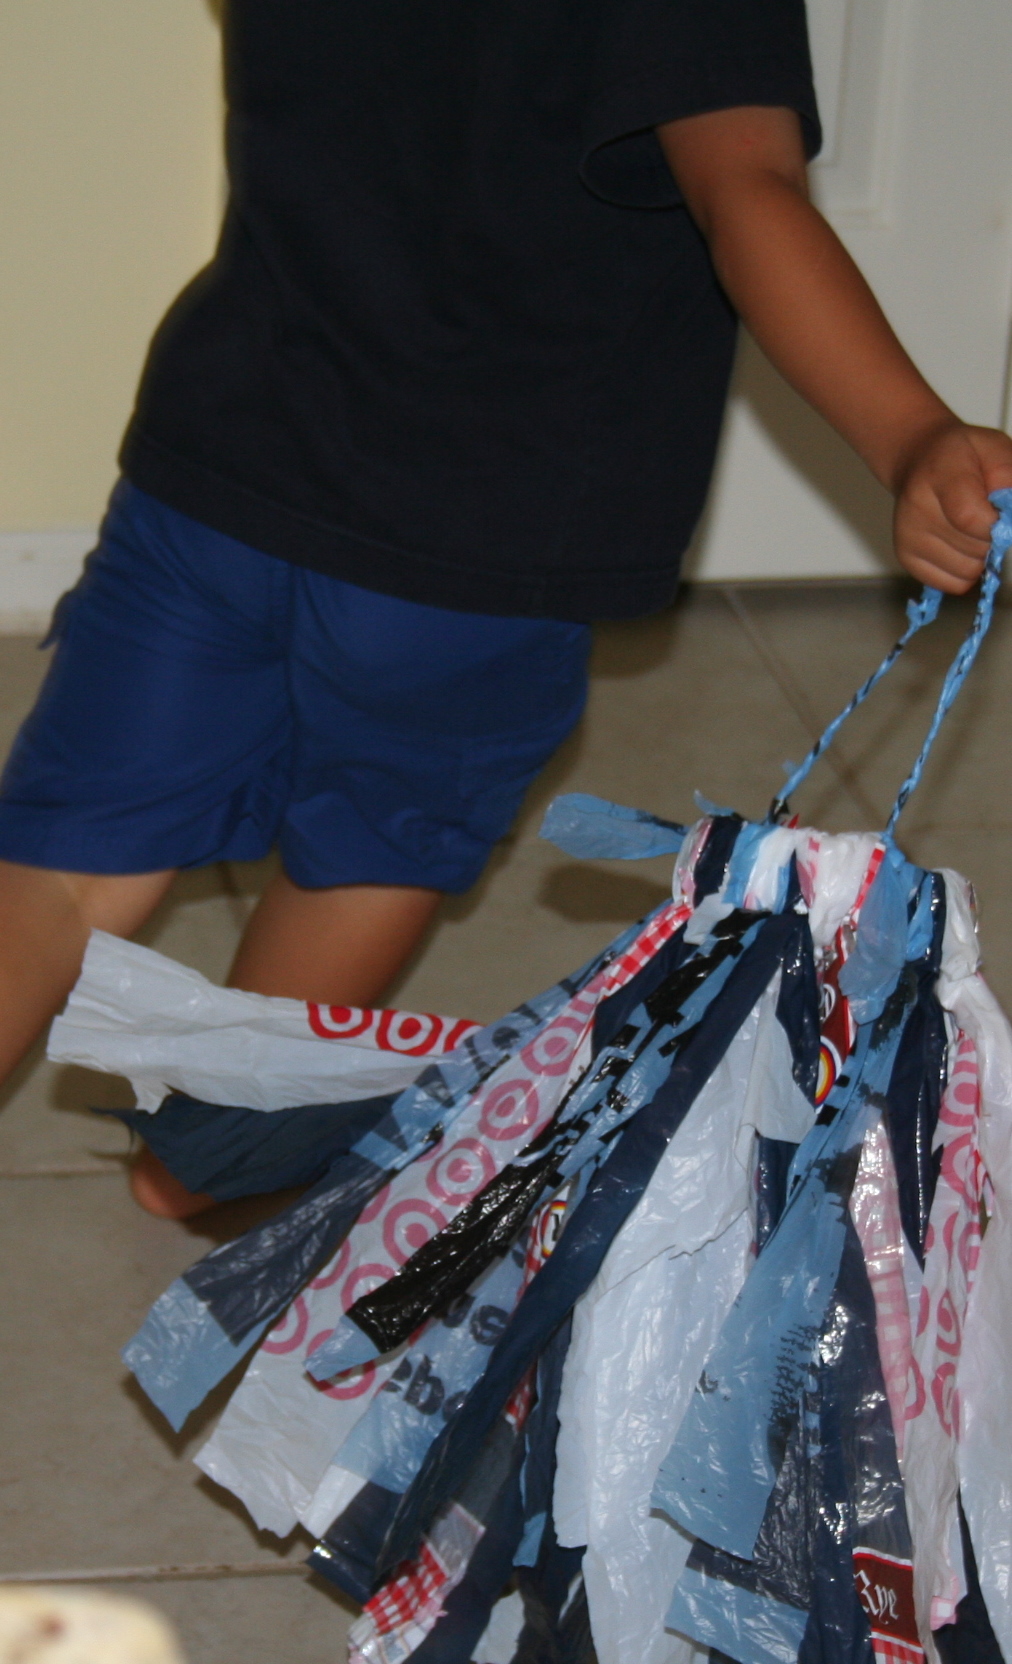
The windsock couldn't be simpler to make--and I'm sure you have everything on hand--so it's perfect for an after school craft.  First, check your recycling bin for something plastic that you can cut into rounds to use as the base.  We used a yogurt cup.  Then, cut up several plastic bags into long strips.  The more colorful the better, though our selection was pretty sad (we're down to the last few since we don't accumulate them like we did before switching to reusable bags).  Next, loop your strips around your base, attach a handle, and hang outside. 

I had to help our four-year old as he couldn't quite master the ends-through-the-loop technique.  Our windsock is destined for the boys' new clubhouse that my husband built this summer.  But first, Leo needed to test it out indoors. 

Next up are pie pops from Luxirare (found via Bakerella)--as soon as I can get my act together and make up a batch of pie dough that is.  Have you seen these?  Individual pie servings.  On a stick.  Um, yes please.

Monday
Jul272009

Pajama party.

Last month I posted the sugar cookie recipe that I always use.  And this weekend, I cajoled my friend into letting me make them as favors for her daughters' birthday party--see, I really, really like to make them and won't let anyone else do them (though this does not apply to you--you should indeed make them.  Unless you invite me to your party, in which case I will).  Her girls had a pajama party and it was really fun.  Look at these super cute invites (how-to here:  Parents Magazine).            


The guests were asked to show up in pjs and there was a craft where the kids decorated pillow cases to take home:                 

And just look at these cupcakes (yes, from that cupcake book again).  I have to make these soon.  I've seen a version with little teddy graham crackers tucked in as lovies--too cute, right?

I could not find a pajama cookie cutter anywhere.  But discovered that in a pinch, headless gingermen work just fine--oh, and for the nightgowns, I cut off the footsies and smooshed the legs together.  For the cookie recipe and a rather wordy explanation complicating my simple tip for decorating (dipping vice frosting the cookies), see this post

And if you are considering hosting a pajama birthday party, I need to add that the most genius part of it is you don't have to get dressed the day of the party--assuming you have cute enough pjs like my friend. This is huge for me as I never seem to leave enough time during pre-party preps to personally get ready. Sadly my guests will often find a nicely staged room but a hostess dressed in her crafting clothes (you save your college tees for painting/moving/gardening?  I save 'em for crafting). 

Thursday
Jul022009

Butterflies.

Recently a neighbor asked me if she could hire me to do cupcakes and the cake for her daughter's First Holy Communion celebration.  I was flattered that she thought of me--but there was no way I would charge a friend for cupcakes and cake.

I only had a few days notice and had a hard time thinking of an appropriate decorating theme.  Then I remembered some flagged pages in my Hello Cupcake cookbook. I love this book.  It's filled with the cutest ideas for just about every occasion. Except, of course, a First Holy Communion.

But it does have butterflies. Beautiful and delicate, they look like they might flutter off the page as you're flipping through the book. And with three boys, I doubted a butterfly-themed party was in our future so here was my chance--how perfect. Because, you know, First  Communion ...butterflies ... get it? Fine. I was reaching but look how pretty.  


Supplies: At least two different colors of melting candy wafer or chocolate (I buy the melting wafers at craft stores like Michaels or A.C. Moore); wax paper; butterfly template; permanent marker; sandwich sized ziploc bags.

Click to read more ...

Page 1 ... 8 9 10 11 12