Shop Duck Duck Wool

Where was that?
Updates

Enter your email address:

Delivered by FeedBurner

Look around
Pumpkins One, Two, and Three (and Me)

when I started the blog...

and a few years in...

and now...

3pumpkinslittle on Instagram 


Entries from April 1, 2011 - April 30, 2011

Friday
Apr292011

Roy G. Biv batter.

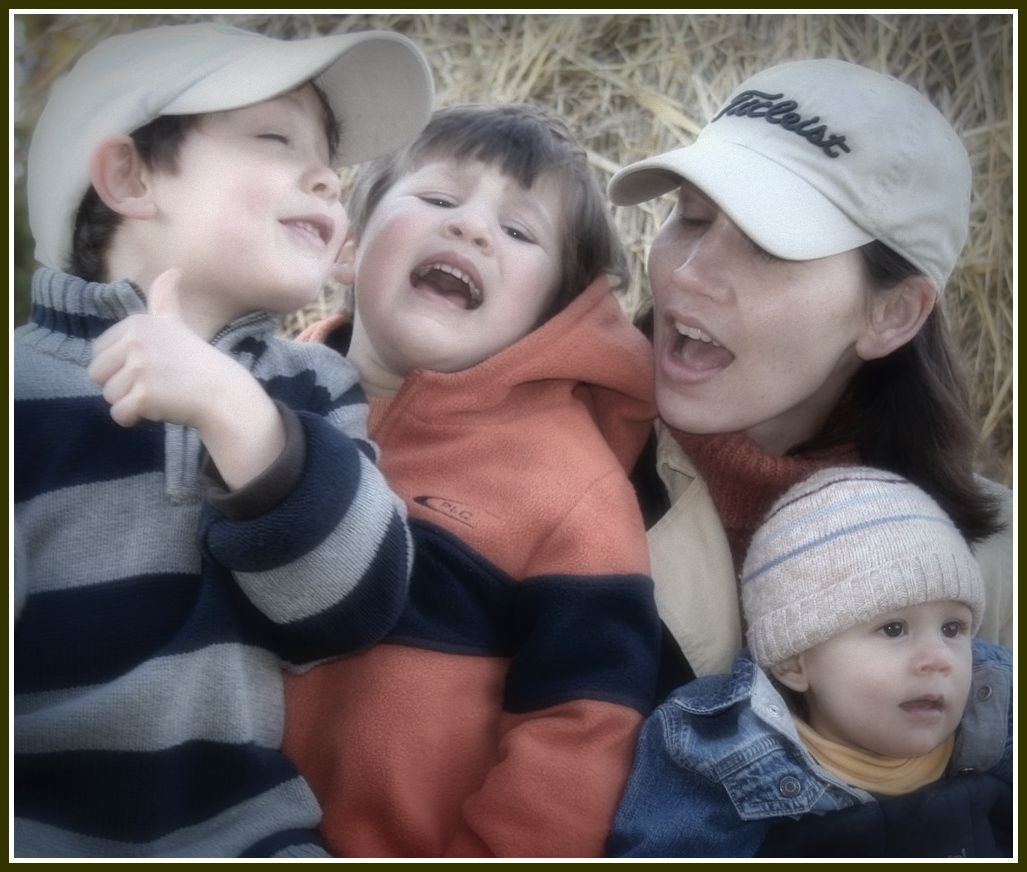
I still need to write up posts on each birthday boy.  We now have an 8, 6, and 3 year-old in residence.  I am not dealing very well with the numbers creeping up...especially the oldest.  How can he almost be on deck for double digits?  He started kindergarten a blink ago.

Every spring we go through quite a sugar rush celebrating three birthdays in quick succession.  The actual birthdays are behind us, but we are still getting together with family and a small group of friends to celebrate this weekend...thus lots of cake was and will be had.

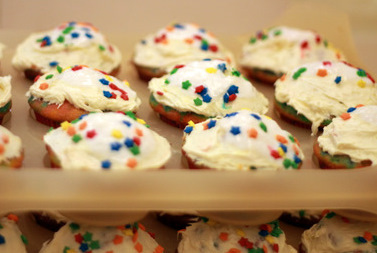
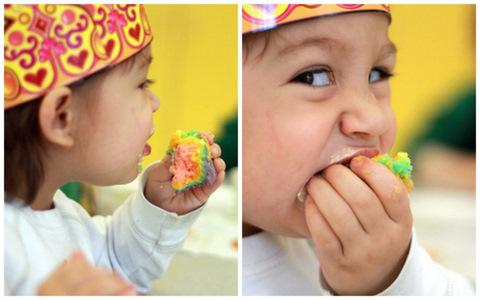
One of the more fun cakes, to date, were rainbow cupcakes. 

I've wanted to try this technique for some time.  It merely requires dividing cake batter, adding food coloring, then layering the batter--without mixing--before baking.  And if your children are rainbow experts, be sure to mind the selection and order of your colors, else you'll hear about it.

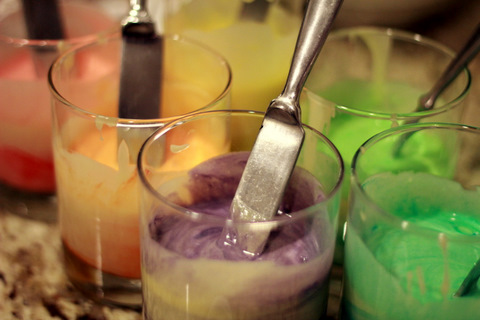
Evidently, I couldn't find spoons to stir. I used butter knives.

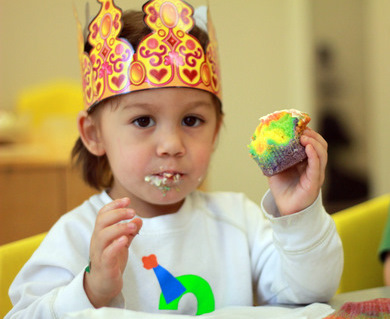
As you can imagine, preschoolers go pretty nuts over rainbow cupcakes (adults too, but that's another story).  In my experience, many toddlers use cake as a vehicle for frosting.  I've dumped many a half-eaten cupcake.  It's not like I mind--after all, it seems pretty silly to make a child finish his cupcake.  But this cake?  Frosting or no, it was gobbled up.  Who doesn't want to eat a rainbow?

I will note that it was a bit of work--the layering, that is.  Next time, I'll put the batter into ziplocs to speed up the process.  And yes, I am assuming there will be a next time. 

William has already placed his order...


Happy Friday!

Sandra

Wednesday
Apr272011

Favorite salsa.

We really love fresh salsa.  The recipe below makes enough for a crowd but it's also just the right amount to make up and enjoy on the side of a few weekday meals (or lunchtime nachos).  Once, I brought it to a summer cook out and spotted a gaggle of teenage girls hijack it off the table and go at it with plastic spoons.  Salsa-free chips were a small price to pay because their moms told me it was the most veggies they'd seen their girls eat.  Ever. 

The recipe, like all good salsa recipes, is a starting point.  So much depends on the freshness and flavor of the ingredients.  I always seem to need a splash more vinegar and cumin.  And a note about avocado...although this shot does not show it, I usually add a couple.  But they must be firm, as in firm enough to hold shape when you dice them fairly fine.  Do not...do not...add soft avocados.  So to recap, firm avocados = salsa approved.  Soft avocados = save for guacamole.  And yes, I'm a little paranoid you will add soft avocados and end with a mushy mess coating all the pretty veggies and blame me.

Here is a rough guide of what I throw together.  You can and should, of course, add and subtract veggies per your preferences.  One of our favorite batches included a sweet (but firm!) mango to go along with grilled fish.

Salsa

Heavily adapted from V and Co's Black Bean and Corn Salsa recipe

  • 2 cans black beans, rinsed and drained
  • 1 cans corn, drained (sweet shoe peg preferred)
  • 4 ripe, firm roma tomatoes, diced fine (you may need more or less depending on size of the tomatoes.  I don't measure but shoot for a 1:1 ratio of tomato to black beans)
  • 1/2 to an entire sweet (Vidalia) onion, diced fine
  • 3-4 sprigs chopped green onion if you have them (I'm Asian.  We always have 'em)
  • 1/2-1 bunch cilantro, leafy party only chopped fine (finely chopping cilantro can be extra work but it's worth it.  I find the key is to wash it ahead of time so it has plenty of time to dry and avoid clumping together.  I wash it when I bring it home, then wrap it in a paper towel and tuck into the fridge until it's needed.  To chop, bunch up the leafy part, chop with a large/wide bladed knife (chef knife or cleaver), then go back over your pile again and again until it's fine enough)
  • 1-2 serrano chiles, stems and seeds removed, minced (optional, only add if you like some heat)
  • 1-2 firm avocados, diced fine (please review crazy-lady notes above on only adding them if they are firm)

Dressing

  • 3 Tbl olive oil
  • 2 Tbl vinegar (I like cider or red wine.  But oddly, right before serving, I find that adding a splash of good ole white vinegar brightens everything up nicely)
  • 1 Tbl lime or lemon juice
  • 1-2 tsp kosher salt, per your taste
  • 1/2 - 1 tsp pepper, per your taste
  • 1-2 tsp cumin (I actually think I put in a lot more but always start small)

Directions

In a separate container, combine the liquid ingredients and whisk to combine.  Set aside while you prep the veggies.  Place veggies in a large bowl and add dressing.  Best if allowed to sit for a few minutes, stirring occasionally.  I often make it ahead and hold it in the fridge, covered.  But if making ahead, only add the avocados right before serving. 

Enjoy!

Sandra

Tuesday
Apr262011

My Aidez sweater.


I finished Aidez a few weeks ago.  My Rav link is here, with journal notes of the process.  The pattern is by Cirilia Rose, whose designs I adore, and can be found for free here.  I was happy that I got to wear the sweater twice before the weather turned too warm.  It was such an educational knit--I feel much more confident in my cabling and seaming techniques, though I still need lots of practice.  I blocked before seaming but think one more blocking will help smooth out a couple of wonky areas.  There are some cross cables on the back, especially, that I knitted inconsistently and regret not being more precise.  I know blocking can't save a piece, but I'm constantly amazed at how much it helps.

I lost count how many times I had to rip out and restart certain sections, but I can say with certainty that if the rows were tallied, I knit the sweater at least twice!  And despite the ripping and reknitting, it is far from perfect.  Nevertheless, I am very happy with it and know I'll reach for it often in the fall.  For now, it's in permanent residence on my office chair as chilly basement garb.  And even though it's not very spring-like, I decided to use it for a new blog header so I could see it often. 

When I look at it, I can't help but smile over how far I've come with my knitting.  And now that it's done--and true to my word--I am promoting myself out of beginner knitterly status.  Whee.

Sandra

Monday
Apr252011

Baked oatmeal.

I realized it's been some time since I've posted a recipe.  Here's a standby in our kitchen:  baked oatmeal.  I've also heard it referred to as Amish style oatmeal, and I did indeed scribble down the recipe from an Amish outpost years ago when my parents lived near Lancaster, PA. 

It's a favorite because I can mix up a batch and hold it overnight in the fridge, then mindlessly plop it into the oven first thing in the morning.  But note that you don't have to make it the night before...just as often, I mix and bake the same morning with slightly different results.  If you've never had baked oatmeal before, I should mention that the consistency is different than what you typically get with instant or old-fashioned varieties.  It's drier, crumbly, yet creamy...if that makes any sense.  And there's a nice bite to the dish.  We like it served with warm milk and sometimes top it with fresh fruit and yogurt.  I should also share that it's rare for me to strictly follow the below recipe.  It's a good starting point, but I tweak it often, adding in nuts, whole grains, dried fruit, etc. 


Baked Oatmeal

Ingredients

  • 1/3 C butter, melted
  • 2 eggs
  • 3/4 brown sugar
  • 1 1/2 tsp baking powder
  • 1 1/2 tsp vanilla
  • 1 tsp cinnamon
  • 1/4 tsp salt
  • 1 C milk + 2 Tbl milk
  • 3 C oats (old-fashioned)

Directions

Preheat oven to 350; mix all ingredients (can hold overnight in fridge if desired); pour into 9 x 13 inch pan and bake for 35-45 minutes.  Serve with warm milk and fruit.

Enjoy!

Sandra 

Thursday
Apr212011

Hiya Mr. Stripey Sock.

After casting on and figuring out some new-to-me territory, I have one sock.  A day ago, it looked like this.

But now, meet my new friend, Mr. Stripey Sock.

It's just a little anklet.  And although it's simple stockinette, I am not at all worried about the so-called "second sock syndrome" (a certain lack of enthusiasm some knitters face when starting the second sock).  I am actually pretty excited about making a Mrs. Stripey Sock--this little fella fits my funny feet extremely well. 

There is, however, one problem I will need to manage.  It seems that knitting socks taps more strongly into my obsessive tendencies than other knitting projects.  I simply could not put down the sock after my designated TV knitting time.  Of course, I realize that this is likely because I am easily amused and have a bit of an addictive personality.  And I love me a challenge.  The first time I played solitaire on a computer, I played for four hours straight instead of working on a college paper.  Swearsies.  I had to nip that in the bud else I never would have graduated.  So no surprise that I'm a goner when a new skill is in my sights and I'm working with a skein of self-striping sock yarn...the colors are mesmerizing.  I'm all "ooooh, looky, cadet blue.  Hmmmm, red's coming....OH! that speck looks like a sprinkle!" and on and on I knit into the wee hours of the night.  I already stay up too late working on an assortment of things so there is no time for this sort of obsessive knitting.  For now, my plan is to only work on socks as portable, out-and-about projects.  We shall see. 

Whatever happens, I do hope to have Mr. Stripey Sock's solemate* in no time.   

Sandra

*Ha!  See?  Easily amused.

p.s.  I'm using Patons Kroy sock yarn from a big box store for this experiment.  I originally thought I'd use a skein of fancy sock yarn stashed but then thought better of it.  And even though I still feel like I'm knitting with toothpicks, I am at least at a point where working on size 2 double point needles no longer feels like I am petting a porcupine.  For the pattern, I'm using a combo of the sock recipe from Yarn Harlot's Knitting Rules and a free Ravelry pattern called the One Skein Sockettes by Lisa Henderson (Rav Link). 

Wednesday
Apr202011

Easy peasy girly decorations.

And why, you might wonder, would a household of boys need girlified decorations?  Because a few days ago, I hosted a baby shower for a sweet baby girl who recently arrived in our neighborhood.  It was a "sip and see" style shower for everyone to ooooh and awwww and make a fuss over the baby.  And because my neighborhood residents have a schedule as crazy as my own, when we pulled out our calendars to plan a workable date, we discovered that the best date was merely a week off.  Yikes.

Queue the easy peasy decorations.  First up, some flowers made by folding and gluing precut cardstock strips.  I hung the flowers with fishing line from the dining room chandelier.  I think they'd make a great garland...

I also wanted bunting but had neither the time nor the future occasion to warrant stitching one up.  As a compromise, I assembled temporary bunting by folding precut quilt squares over twine.  And as a bonus, working with the lovely prints has me convinced it's time to finally quilt them... 

And of course there were cake pops.  Super simple but girly red velvet cake pops.  And I want to note that even though the party was pretty much kid-free, there were only two pops left--so I think adults like them, too. 

The short notice did not leave me enough time to make a set of my signature 'welcome baby'  personalized burpers.  Hopefully I can get to those soon.  But I did knit up a quickie hat and a pair of sweet booties...

The hat is the same pattern as Will's beanie, just sized down to fit a newborn.  And the bootie pattern is from a vintage magazine my mother-in-law handed down.  I tucked both of these handknits alongside some store bought girly clothes.  Yes, store bought...because I'm sorry, I know I'm a proud "gift homemade" supporter but you can't blame me for grabbing a chance to shop in the little girl's department!

Sandra

Tuesday
Apr192011

Back in the saddle.

Well, sort of.  I am all about moving forward these days, so I'll just pick up where I left off.  And thanks to you nice readers who emailed me to check on me, worried because of my blog break.  I've always loved that even though my blog isn't a big comment generator, I get a fair amount of emails about this or that from friendly folks I've never met. 

So, moving along...

My Aidez is long done.  I even got to wear it a couple of times before the weather warmed.  Just need to take some FO shots and post--then I will tuck it away.  But I will warn my friends that I will be living in this thing come fall...I love, love, love it.  I might even make another, which is utter nonsense considering how many other sweaters are waiting in my knitting queue.

I plan to put up two new sections on the side bar--an "on the needles" and an "off the needles" to better organize my knits (maybe my sewing too if I can ever manage to get back to it).  Right now, "on my needles" would include a simple, smooshy garter cardigan that I hope will be perfect for spring...

And a sunny shawlette.  I think this colorway looks like scrambled eggs so it's fitting as we lead up to Easter.  But in the end, I may need to rerack "how to overdye yarn" as a priority on my fibre skills list...it's a little too 'Hello Yellow!' for my tastes.  I think.  No, I'm pretty sure...

And socks.  I've decided it's time to tackle the knitterly milestone of knitting a pair of socks.  No picture yet.  But yarn is selected and research has commenced...

Sandra