Shop Duck Duck Wool

Where was that?
Updates

Enter your email address:

Delivered by FeedBurner

Look around
Pumpkins One, Two, and Three (and Me)

when I started the blog...

and a few years in...

and now...

3pumpkinslittle on Instagram 


Entries from December 1, 2009 - December 31, 2009

Thursday
Dec312009

Happy happy New Year!

Just a quickie post to wish everyone a Happy New Year!  We're about to head out to our annual neighborhood progressive dinner party--we're helping out with desserts at the last house. 

I'll be back next year (couldn't resist) with lots to share from over the holidays.  It was our best one yet.  And I hope yours was as well.  Now off to finish the fixins' for the chocolate fountain...and berry simple syrup for the bellinis...oh, and figure out what on earth to wear.  Am thinking my daily uniform of LL Bean garb won't quite cut it.

Happy New Year!

Thursday
Dec172009

Rudolph and Christmas Tree cake pops.

I made these for the kidlets "Gingerbread" House decorating party.  The kids loved them.  Most of the grown ups did too.  In fact, I'm pretty sure I remember one mom refusing to share her tree pop with her adorable children because they already had theirs.  I won't name names but you know who you are.

If you've never made cake pops before, be forewarned that once you do, you'll be hooked.  You'll start looking for all sorts of reasons to make them.  Flag day?  Cake pop.  Kid stubbed a toe?  Cake pop.  They're a bit of work, but worth it.  When I make a batch, I usually also make an extra batch and freeze them undipped (yes, I freeze everything).  So right now I have two dozen naked cake balls waiting to be dressed for Christmas.  We'll do more Rudolphs and trees, and I'm also thinking of doing a Santa and some angels.  I also might make them for our neighborhood New Year's Eve progressive dinner party...but I need some ideas.

Check out the how-tos over at Bakerella, who started the phenomenon.  She gives you directions on how to use a box mix and store bought frosting.  I personally think they taste better with homemade cake and frosting but will admit, the cuteness factor is what makes them special.  One thing to note, however--if you do go homemade, make sure you use a frosting that can be left out at room temperature, i.e. doesn't require refrigeration.  Some brands of dipping chocolate recommend you don't refrigerate and since these hold fine for a few days (I've gone up to 5) at room temperature, that's what I do. 

ETA:  I wrote some details as a response in the comments section, so be sure to check there for more tips...

Wednesday
Dec162009

Freezer apples.

I meant to post this tip back when we did our big apple picking trip in the fall.  But as I pulled out a bag of frozen apple slices to make a quick crisp, I remembered I never did.  Oops.  Well, at least now I can show you how, with a little prep, frozen apples can stay as fresh as the day you put them into the icebox--does anyone say icebox anymore?

You'll need a large bowl and about a gallon of cold water and 1/4 cup of salt (I've actually never measured but this is about right).

Heat up a cup or so of the water and place in the bowl with the salt and stir until dissolved.  Add remaining cold water.  Now, peel and slice your apples however you like and as you finish each apple, immediately place in the salt water.  Once you have a bit, you'll have to push down on the slices to make sure they are all submerged.  Let them sit a few minutes then drain in a colander.  Do not rinse--you will not notice the minimal salt flavor in your recipes.  Bag in freezer bags and label.  I like to divide mine into 3 pound portions because that is what my crisp recipe calls for.  This always works for me...I've taken them out 6 to 9 months later and they have never turned brown!

I know apple season is over for most of us, so file this away for next year okay?

Find more works for me tips over at We are THAT Family.


Tuesday
Dec152009

Well hello there.

Hiya.  Blog much?  Didn't I mention I was going to take a wee break during the holiday crunch time?  Oh, right.  That's because it wasn't exactly planned.  Let's just say I'm tired of the rousing game of duck duck cold we've played these past couple of weeks.

Looking on the bright side, I sure am happy that the bitty bouts of sickness seemed to pop up between activities and special days.  Shockingly, everyone was in good health, and even better spirits, for our annual kid's "gingerbread" house decorating party.

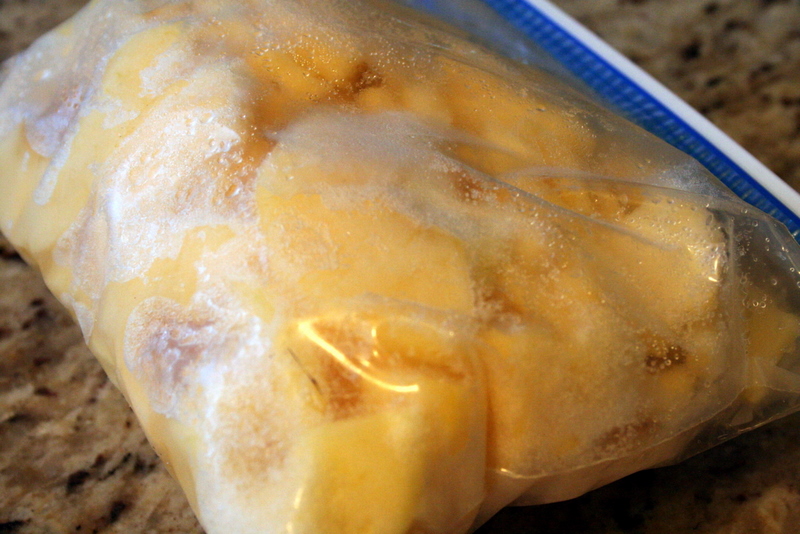
I use graham crackers instead of baking gingerbread and sugar "glue" to pre-build the houses.  I learned last year that using royal icing for the mortar wasn't strong enough for excited little hands.  So this year I went with the heavy duty stuff--melted sugar.  I got the idea from the December '09 Better Homes and Garden magazine.  It really is stronger and, as an added bonus, it's a lot faster if you're building, oh, a gazillion.  You just melt some granulated sugar in a heavy bottomed pan (I use my enameled cast iron) then dip the edge of your graham cracker in it, then join with another cracker.  Be careful--this is definitely not a step for the munchkins.  For clean up, let your pot soak in hot water to dissolve the sugar.

Another important thing I should point out--unless you are very careful about how far you let the sugar carmelize (and you can see from the above photo that I was not), it won't taste good.  In fact, it tastes pretty awful because burnt sugar tastes pretty awful.  It's no problem for us because the houses are merely a prop for the pounds and pounds of candy they support.  And also, the kids don't eat the houses because these things sit around until after Christmas and get pretty stale.  I do, however, let my kids pick a candy or two off every now and then.  Okay, daily.

Here's a photo montage of the basic assembly process--I think it's pretty self explanatory.  Some tips:  when creating the gable, use a serated knife and gently saw back and forth.  Also, if crackers break (oh, and they will) set aside the pieces to doctor--just dip in the sugar & glue back together and lay aside until it sets up.  Don't stress about making these look perfect.  They're kind of cute crooked.  And kids love crooked. 

A few other things we like to do for the party:  cut down cardboard boxes (you know, all those you're getting daily from Amazon right now.  Right?  No?  Oh--it's just me?  Fine.) and cover with foil to make freebie cake boards for each party guest to tote home their masterpiece; ask guests to bring a bag of candy to share for decorating; make individual frosting piping bags by putting a big dollop of frosting into sturdy ziplocs and either tape or rubber band them right above the frosting to assist little hands with applying pressure while squeezing; and use colorful cereal to inexpensively round out the candy supply--especially great for walkways and "stone" accents.

But most of all, have fun.  Even the youngest of ones will actually sit still and do this activity with some help--we were so amazed at little Will's efforts!  All the kids did great.  We had over 25 taking over the kitchen and the house decorating portion was certainly the quietest time of the entire party.  Here's to making memories...


p.s.  Get more DIY ideas here.

Tuesday
Dec012009

DIY Holiday wreath.

We've been laying low these last few days.  Thanksgiving was wonderful--my parents did a great job.  After the big meal, the day mostly consisted of more eating and lots of cuddles.     

I think it was Will's first experience of an uncomfortably full tummy. 

We had an unusual spell of warm weather last weekend.  And so we tried to make the most of it by spending as much time outdoors as possible.  This means I did not get the house decorated for Christmas yet--so now I feel like I'm already behind.  But the calendar says it's just Dec 1st so I guess I'm okay.  But I'm still fretting.  We have our gingerbread decorating party in less than two weeks!

I did manage to do a little decorating though.  I was inspired after a girls night last Sunday (before husbands and babies, a group of my friends and I held a regular girls night and we're trying to get it going again).  A friend told me about one of her Thanksgiving traditions--a relative brings her greenery clippings so that she can make a holiday wreath.  And it just so happens that Charlie trimmed several holly bushes over the weekend--so I whipped up a wreath while the boys played outdoors.  It was so simple and took less than 30 minutes!  I think we'll adopt this tradition, too--thanks Katie!

Here's how I did it:

1.  Gather clippings and trim down to 4-6 inch sections.

2.  Gather wire and wreath form.  I used a grapevine wreath I had on hand.  Lay clippings on form and wrap with wire.  If you are using a grapevine wreath you can poke your clippings into the wreath to help you with placement.  Then, working downwards, overlap wire with new clippings and wrap with wire again.  Continue until your form is covered.  Secure wire.

3.  Hang on door (you'll want to mist with water occasionally to keep it fresh).  Make boys come over and give plenty of oohs and ahhs, even though all they really want to do is ride their bikes.

For more DIY ideas, have a girls night and get ideas from your crafty friends!  Also be sure to check out Kimba's DIY post on A Soft Place to Land today