Shop Duck Duck Wool

Where was that?
Updates

Enter your email address:

Delivered by FeedBurner

Look around
Pumpkins One, Two, and Three (and Me)

when I started the blog...

and a few years in...

and now...

3pumpkinslittle on Instagram 


Entries in upcycling (5)

Wednesday
Mar032010

Sundress to apron refashion.

After I made the apron for the auction, I was pretty gung-ho to make one for my very own.  Until I faced my carefully curated stash, that is.  Because then I plain out froze.  Deciding which fabric combos to cut into may take some time--I've hoarded some of these prints for years and I love them.  And, yes, I do mean love/love, not just like/love.  So until I decide, I thought I'd do a quickie upcycled version.      

I found a decent looking sundress at the thrift store for only $4 (my favorite thrift store has a 50% off sale fairly regularly, which is when I try to load up on refashioning materials).  The cut and size of the dress fit me well enough but I don't think it's essential considering how much is eventually cut off.  And as I didn't even like/love the hibiscus print, it was the perfect piece to experiment with.

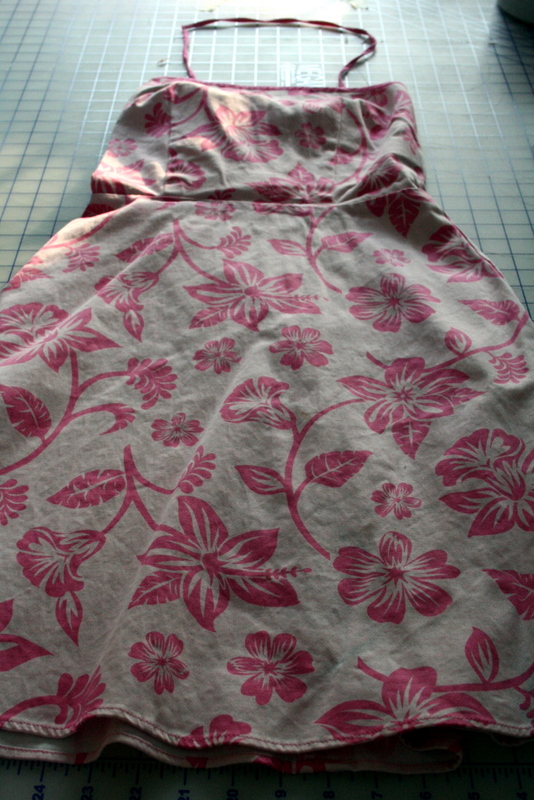
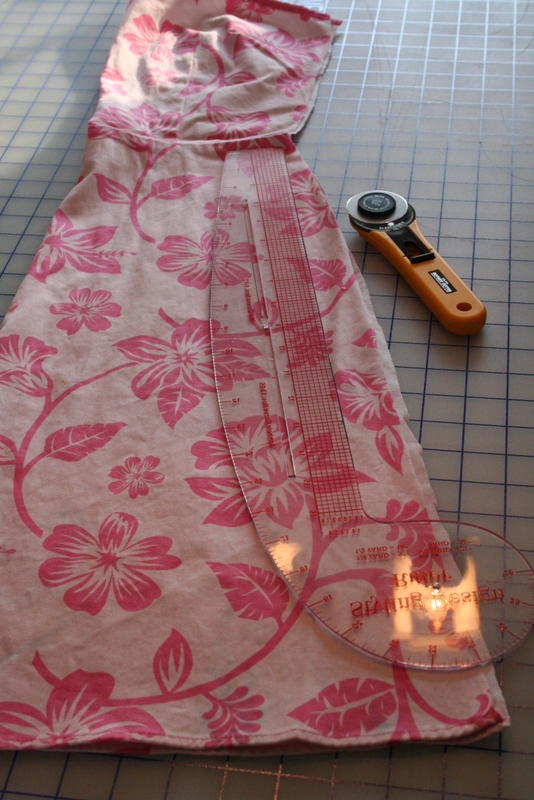
I cut off the straps and the side seams to create a front panel...  

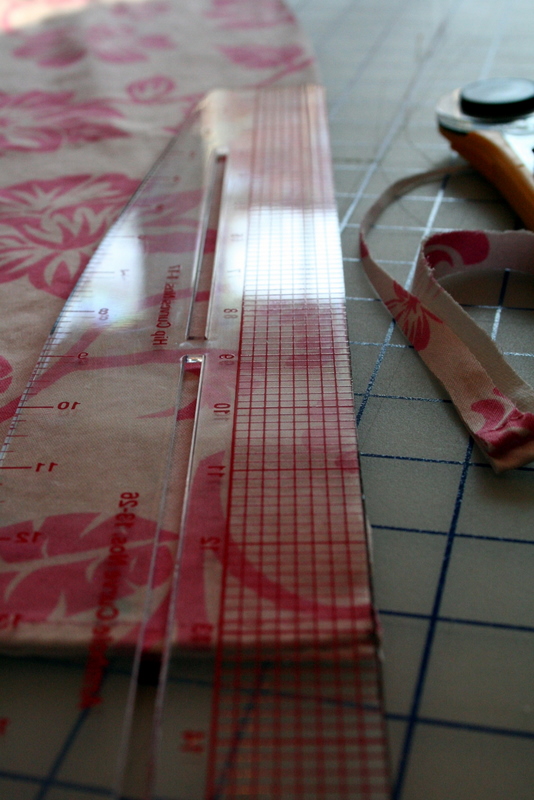
...then straightened up the sides into an A-line shape.  I left the bodice top at the full width because I knew I wanted to ruffle it.

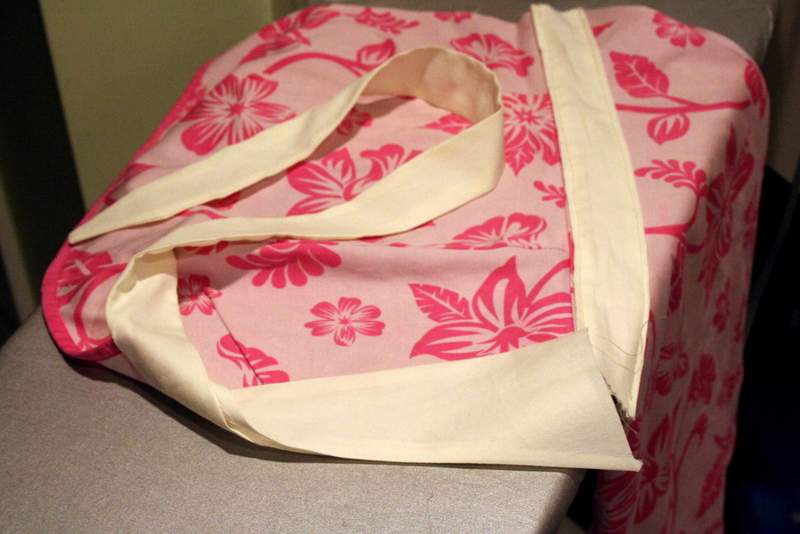
Next, I cut up some cotton lining remnants from my stash for the sashing/ties.  Unfortunately, I didn't have long enough pieces so some patch-work was necessary (which made the entire project more fiddly than I expected)...

The construction and sewing process was completely done on the fly.  I wouldn't call it terribly efficient--working from a pattern turned out to be easier.  But this was definitely faster.     

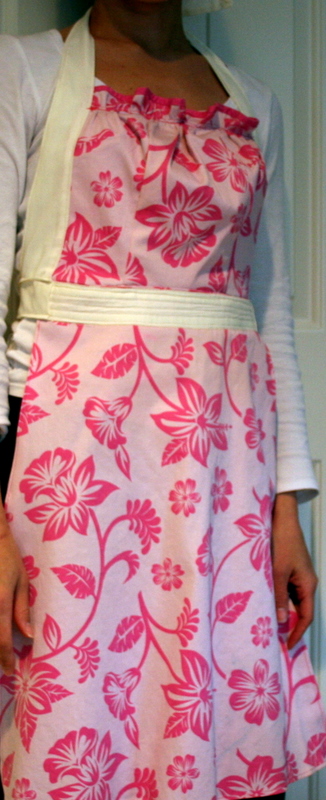
The end result?  A definite meh.  It's just okay.  I don't love it but do think some cute pockets would really help, so on they will go.  Someday.  The biggest hassle was the side sashing done without the benefit of a pattern.  Should I attempt this again, I'll just do a simple, continuous, sash at the waist and ties that attach to the top.  

But all in all, it is still a lot prettier than the other aprons currently hanging in the pantry.  Those were accumulated mostly by way of freebie promos, so you can imagine.  And I also keep reminding myself that it'll be covered in marinara sauce or brownie batter splatters within 24 hours.

I was happy to have a reason to test out my new tripod.  I will work on lighting next, promise.  Leo was absolutely fascinated with the auto shoot process.  And he couldn't resist sneaking in for a little smooch.  My goodness, does he ever have my heart in such a special way.  Leo is my love bug. 


Thursday
Feb252010

Bookmarked craft--ruffled scarf.

My list of 'must-try' craft tutorials bookmarked on my computer is getting ridiculous.  Let's just say that if I were going old-school with a paper pile, I'd get flattened if ever the stack should topple.  And because even virtual lists need some checkmark love, I've declared 2010 the year to tackle at least some of the crafts.  First up, an upcycled T-shirt to ruffled scarf I first saw on Vermillion Rules.

What I did:

I used the remainder of a white t-shirt (left over from the hoodie project) and cut it into 6 inch wide strips...

sewed them together, end to end, to make one long piece...

then sewed basting stitches (about an inch and a half in) on both edges.  I set the stitch length to the longest and upped the tension to create the ruffles...

I then set my sewing machine back to its normal settings and sewed down the ruffles--I did it on the front and back then removed the basting stitches. 

So easy, so quick.  And free!  Just enough trendy ruffles to add a feminine touch to my everyday uniform of a basic t-shirt and jeans.

*note to self--figure out a more inspiring place for self-photos.  Or--at the very least--clean the jammy handprints off the mirror before taking the photos. 


Tuesday
Feb162010

Lil Blue Boo & Dharma Trading Co. design challenge, part 2.

I know the challenge is officially over, but I couldn't resist trying to get a few pictures of the hoodie in daylight.  And I was wrong when I said no one here could squeeze into the size I made--William could.  Technically.  But he wasn't happy about it.

One of the things I love most about Ashley's hoodie pattern is the use of contrasting pieces--it really ups the look but isn't hard at all.  And it is so versatile.  Plus, she gives you lots of hints on pattern placement to optimize reusing existing hems on the t-shirts you're upcyling.  This saves tons of time.


As I mentioned, I added a lining to the hoodie, using a star print I made with freezer paper stencils.  This technique is so addictive.  I did a lot (and I mean A LOT) of freezer stencil projects last year, but then put it away for a bit as I moved onto other things.  Doing it again really reminded me how great it is--I think that's exactly why I chose to try the challenge, to get the creative juices going.  Check out Ashley's tutorial on the process if you've never done it.

There are several ways you can line a hood.  But instead of hiding all the seams, I chose to showcase them in the lining.  Again, because I love the contrast as a design element.

The hood itself fits really well on the nognog.  When I cut it out, I thought I must have cut on the wrong line because it looked huge.  But take it from me, trust the pattern.

I will be sorting through the closets for more knits to upcycle.  Sir William wants one that fits.  Here he is  rushing the camera while trying to take off the hoodie by yanking straight up on the hood (reinforce those seams!).  It's his classic "we're done here" move.

I cannot wait to check out some of the entries.  And I'm the lookout for more challenges like this--not because I think I have a shot at the competition, please--it just really worked to motivate me.  And it's also nice to be a part of it.  Like a modern day sewing circle.

 ETA:  If you'd like to print out your own baby to-do list, I just added a pdf you can download on the original post.

Monday
Feb152010

Lil Blue Boo & Dharma Trading Co. design challenge.

I'm sure many of you fellow crafters out there follow Lil Blue Boo--I sure do.  And I was very excited when Ashley announced her Dharma Trading design challenge.  Of course she gave us tons of time to try to put something together, so did I use that time wisely?  Of course not.  Go ahead and review the "if you wait until the last minute it only takes a minute post".  But in my defense, it's been hard to get anything done these days as the three munchkins have been out of school/preschool for over a week (but I'm not going to talk about the snow any more.  I just Can't). 

Nevertheless, because I already had the hoodie pattern (and had an idea for a fun applique), I thought I'd make something today.  Yes, today...the last day of the challenge.  So during Will's nap, and after bedtime, I whipped up a little 6m-12m hoodie.  I LOVE this pattern!  It is so great to work with.  And--obviously--it takes no time at all.

I was able to take one of Charlie's old tees...

and one of my ill-fitting plain white tees, embellished with freezer stenciled stars (to make a lining for the hood, which is something I added in)...

and a baby's 'to do' patch I printed onto cotton, then appliqued on...

to create this fun hoodie.

I really wish I had better pictures.  You can hardly see the red top-stitching or star lining in the hood, but trust me it's all there and I think it's darling.  If I had planned ahead, I could have found a suitable model as no one here can squeeze into this size.  But I wanted to do the 6m-12m sizing this go because of the applique.  In case you cannot read it, here's the image I made up in my photo editing software then printed onto cotton (a thrifted blue sheet). 

(ETA:  Here is a pdf you can download if you'd like to applique your own baby to-do list.  If you're more comfortable working in word, try right clicking the above image, save it to your computer, open a word document, and click 'insert picture'--you should be able to resize the image by dragging a corner of the image.  Let me know if you need help.)

I plan to give this hoodie to a friend who just had her second baby.  I'll tuck in a laundry marker so she can just jot down the date of some milestones as the hoodie gets worn by her newest munchkin...it makes me smile.  Plus, I really could have used something like this for babies no. 2 and 3--poor things, I was very bad in recording important dates by then.  And I have a thing for lists so it's right up my alley.

There will be lots more hoodies in this house for sure--ones that fit my kidlets.  I cannot endorse this pattern enough.  Again, I just adore it.

ETA:  p.s. check out this post if you're looking for more pictures and/or info on how I liked the pattern.

if you're looking for more pictures and/or info on how I liked the pattern.

Wednesday
Jan202010

Quickie upcycled craft, winetag.

We live in a neighborhood filled with great families.  The kind of folks you would choose to live by if you could, somehow, choose your neighbors.  (And by the way, I know I'm constantly gushing on and on about my family, my in-laws, my friends, my folks, now this...but, sorry, nice people abound in my life.  And it's good because it makes me try to be a better person to deserve them.)

It is not at all uncommon for the phone to ring on Saturday morning with a casual invite from this or that household, asking if we are free for supper later that day.  Somehow the invite always seems to fall on a day that I could especially use a night off from cooking. "Bring the kids" they'll say, knowing that a babysitter can wreck our solo-income budget. 

We try to reciprocate hosting but are way, way, behind.  And because I know our various neighbors well enough to know (and appreciate) that they will continue to have us over many more times before we could ever settle the score, I wanted to have some wine tags ready--we try to at least bring over some decent wine...and a dessert, too, if I'm allowed.

I found some hang tags in my stash of things to upcycle--I think they came off of some flip flops from last year.  I thought they were super cute so I mod podged some decorative paper to the backs and brushed on a few layers of chalkboard paint on the fronts.  There.  Done.  Quick, easy, no fuss allowed--just like these neighborhood dinners.  And as an added bonus, the tag can be wiped clean and reused by our neighbors when they're inevitably invited up the street...