Shop Duck Duck Wool

Where was that?
Updates

Enter your email address:

Delivered by FeedBurner

Look around
Pumpkins One, Two, and Three (and Me)

when I started the blog...

and a few years in...

and now...

3pumpkinslittle on Instagram 


Entries from August 1, 2009 - August 31, 2009

Monday
Aug312009

More t-shirt embellishing.

Our oldest, Max, started first grade a few weeks ago.  And according to him, it's much different than kindergarten.  Every day when he gets home, he tells me it is really, really hard--the reading, the writing workshops, the lack of snack time, so on.  Max generally handles whatever is thrown his way, so I'm surprised to see his new routine wipe him out each day.  Often, he collapses and curls up on the couch for a few minutes as I get his snack ready.  He always asks for one thing as he decompresses--his stuffed dog, Clifford.  Clifford joined our family when Max was a baby and it quickly became his lovie.  And although Max is in a proud "I'm a big boy, not a baby!" stage, he has not outgrown Clifford.  He even gave Clifford a family--two baby Clifford children and another stuffed puppy for a wife.  Here is a picture Clifford "took" of Max and Clifford's family after Clifford's wedding.  Yes, there were invitations.  And yes, I did the flowers.


Max's kindergarten teacher let the kids bring in special items to make the transition easier, so it was not uncommon for Clifford to hitch a ride to school in Max's backpack.  But so far, there has not been an opportunity for Clifford to check out first grade.  And I can assure you that Max is not going to suggest it because he thinks you don't do such a thing in first grade.

So, I took a red t-shirt that I picked up because I liked its weathered, washed finish, and machine stitched a familiar image onto it.  This way, Max can at least take Clifford's likeness to school on any day he should want his faithful friend by his side.  It makes us both smile.

I used my phone-book paper method, so see my previous post for a full tutorial.  But in a nutshell, I traced Clifford's outline onto a sheet of phone-book paper.  I pinned my paper onto the t-shirt, which was reinforced with some lightweight adhesive stabilizer underneath (because the fabric was super stretchy).  I machine stitched a straight line (using a short stitch to perforate the paper) following my tracing.  I ripped off the paper and then went back over the stitches with a tight zig-zag (I found if I zig-zagged directly onto the paper, it caught too much paper within the stitches).  I used black fabric paint to fill in Clifford's eyes and collar.  And as I post this picture, I see that I forgot to fill in his nose so off I go to remedy that.   

Wednesday
Aug262009

Tutorial: Reverse applique using recycled phone book pages.


I'm a big fan of reverse applique--it's so fast and easy.  Usually I trace an image onto my outer fabric using a water-soluble pen, but when I'm altering a dark fabric, it's hard to see any markings.  So on dark fabrics, I usually make a paper template of the image, pin it to the outer fabric, and stitch around it.  But sometimes that doesn't work too well--it can be hard to negotiate around fairly intricate shapes even if you do pin down all the edges.

Last week, Leo and I decided to embellish some plain tees and we didn't get around to making them until the very end of Will's nap.  Trying to save time, I decided to just stitch right onto my printed image (rather than cutting it out beforehand) then rip away the paper--sort of like paper piecing on a temporary foundation if you've ever done that in quilting.  My first attempt was okay, but I used plain computer paper and discovered it was too thick, leaving too many bits of paper caught in the stitches. 

So, on my hunt to find a thinner paper (but not use up my precious tear-away stabilizer stash), I came across an old phonebook destined for the recycling bin.

Pages from it worked great--the paper tore away nice and clean.  But there are a few things to note.  I keep a needle set aside to use on paper only.  Sewing through paper really dulls a needle, so although I know you should use a ball-point needle on knits, I end up using whatever my "paper" needle is at the time (I'm usually altering what would otherwise be donated, stained tees, so I don't fuss around too much and just dive in).  Make sure to use a fairly short stitch as it will help to perforate the paper, making it tear away easily.  Also, I rubbed my finger on the phonebook page to make sure that the ink wouldn't rub off like crazy.  It didn't.  But still, this might not be the best medium to use if altering a light colored garment.

You will need:

Clothing to alter

Desired image traced onto thin paper like phone book pages

Contrast scrap of fabric larger than your image

Straight pins

Sewing machine

For inspiration, I usually do a Google image search for whatever it is that the boys would like on their shirt.  I then hand draw it onto the paper.  You could also trace it over a light box but since I don't have one, I am often found tracing against a window.  This time I traced a puzzle piece.


Be sure to use a color you can easily see.  I do not have a see-through sewing foot so I like to trace my image in bright red.   

 Pick out your contrast fabric and decide on where you want to place your applique. I often like to center them, but if it's your first time, you might want to pick an off-center spot so you don't have to worry about precise placement--a lower front corner always looks nice.    

Place your contrast fabric, right side up, beneath your desired applique spot.  Place your paper template on top, makiing sure the contrast fabric is beneath all of your traced lines.  Pin, catching all three layers:  your paper, the garment, and the contrast fabric.

Set a short stitch length on your machine to really perforate the paper to make it tear away easily.  Stitch directly onto your 'sandwich' following the outline of your image, removing pins as necessary.  Don't forget to backstitch at the start and finish.

Gently tear the paper, pulling away from the stitches, not across.    

Using small detail scissors, carefully cut away the top fabric to reveal the contrast fabric.  Cut close to the stitched line but you want to leave a little bit of the top fabric so your stitches don't pull through.

Your edges will look a little imperfect until you launder the garment.  After washing it, the knit fabric will curl back for a nice effect.

Trim the contrast fabric from the back.  I like to use pinking shears. 

Now give it to the patiently waiting munchkin to wear! Oh, and we did a rocket too.

Have fun!


Tuesday
Aug252009

Cupcakes at hand.

Cupcakes.  Who doesn't love cupcakes?  I have been a huge fan (some would say pusher) well before boutique bakeries opened on every corner and made them trendy.  I like to always have the option of breaking some out for even the most impromptu of celebrations.  Here's my not-so-secret secret--they freeze beautifully.

When I make a batch, I set aside a half dozen for us to enjoy right away (naturally).  Then, I freeze the remaining dozen and a half from a standard batch--frosted and all (I like to put them back in the baking tin after they are frosted to set up in the freezer).  Once frozen (the frosting will get firm but never rock hard), I pop them into a ziploc to be handy as needed.  If you do this, just be sure to take them out of the ziploc while still frozen and allow to thaw at room temperature to keep the frosting lovely.  So, you just remembered tomorrow's school party?  No problem.  Spontaneous neighborhood happy hour?  Bring it.

If you make your cupcakes with fresh ingredients, I would not let them go in the freezer for more than 30 days (actually, we've never even come close to the 30 day mark--they get eaten up like crazy--so that's sort of a guess).  Oh, and another tip.  Next time you're shopping at a craft store, pick up an oversized frosting tip--I can frost two dozen cupcakes in no time with one of those!

Monday
Aug242009

Book love.

I am so excited to get this book! I have to ration my Amazon book purchases because, you know, we're living off one salary these days and groceries are supposedly more important.  But, man, is it hard!  I can go without the trendy clothes I used to load up on because I still get my retail therapy fix by dressing the boys in cute gear.  And besides, do I really need to dress up to go to the park, the grocery store, the elementary school, or the doctor's office?  Um, no.  But books.  Oh, books.  I just adore them and have a hard time resisting them, especially cooking and crafting books. I usually check them out of the library first to see whether I really want to buy them.  But with Amanda Blake Soule's newest book, Handmade Home, I just went ahead and ordered it.  I loved her first book, The Creative Family, so much that I knew I'd want her latest.  I'll hopefully post about some creations soon--I want to get a head start on Christmas presents (yea, right--but a girl can dream).  And yes, the UPS man thinks I'm a crazy stalker lady because whenever he turns into our neighborhood I am out front waving to him because I assume he's bringing me this book.  Tracking info says tomorrow!

Thursday
Aug202009

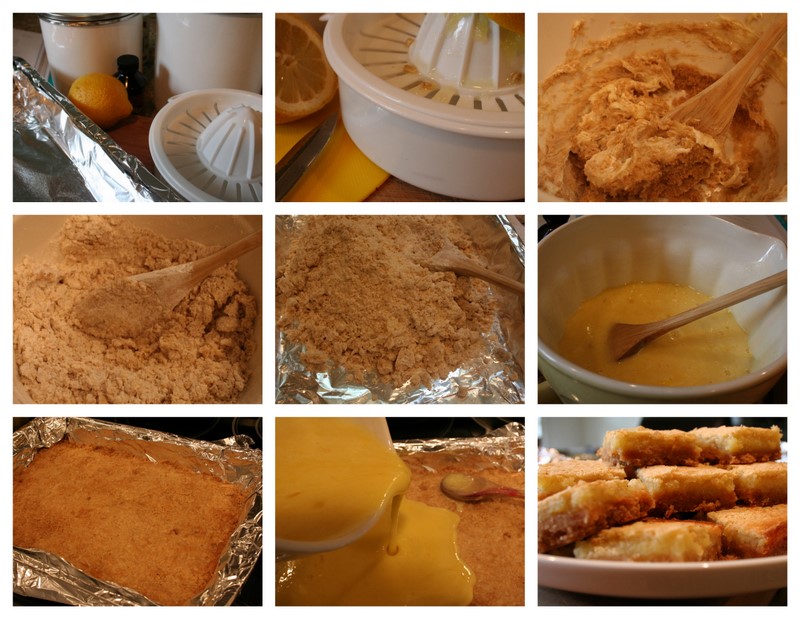
Favorite Lemon Bar No. 2.


The boys love, love, love lemon bars--which makes me laugh.  I mean, I love lemon bars, too.  But I'm pretty sure I didn't discover just how much until well into my college years.  Before that it was all chocolate, all the time--it often still is but now I love just about every dessert.  In fact, I am the absolute worst person to be with when it's time to order dessert.  As I look over the menu, the convo in my head goes something like this, "oooh, chocolate molten cake.  Hmmm.  But I've had that a gazillion times.  Ohhh, blackberry fool.  Yum!  I love berries.  Oh! Oh! Oh!!!! Burnt sugar flan with coconut sauce.  That sounds amazing--and different.  But then there's a banana bread pudding--you can't go wrong with a bread pudding."  And so it goes, round and round, my own version of dessert roulette until someone makes me choose.  But in the end, I actually don't choose.  I just go with wherever my mental ball lands when the waiter arrives, declaring the choice in a flustered manner with my eyes shut tight, scared stiff that I'm making the wrong choice.  My poor husband. 

Anyhoo.  Back to lemon bars.

The boys like to bake with me and one of our past favorite lemon bar recipes called for cutting in chilled butter for the crust dough.  I'll go ahead and pass on that when cooking with children.  So I started looking for a new recipe that still gave us a to-die-for crust without fussing with airborne butter (more specifically, butter bits flicked by a four-year-old with remarkable aim). 


I found one that used softened butter and brown sugar.  You give up the flaky, shortbread crust you get with the cut-in cold butter.  But you get a nice, chewy crust--almost carmelized--due to the brown sugar and softened butter.  The filling could be tarter in my opinion so I plan to tweak that a bit.  I did not have enough lemon juice for the recipe, so I added some lime juice.  Maybe that made a big difference?  Next time, I will play around and add at least another 1/4 cup of lemon juice (or maybe lime juice--I liked the flavor it brought).  I think with all the eggs, the filling will still set up, as it was plenty firm.

Lemon Bars (adapted from Better Homes and Gardens Magazine, May 2008)

Ingredients

  • 2/3 cup butter, softened
  • 1/2 cup packed brown sugar
  • 2 & 1/2 cups all-purpose flour, divided
  • 6 eggs
  • 2 1/4 cups granulated sugar (*I used less, about 2 cups total)
  • 1/2 cup lemon juice (*I'm going for a generous 1/2 cup next time, plus the juice of one lime)
  • 3/4 tsp. baking powder

Directions

  1. Preheat oven to 350 degrees.  Line 13x9x2-inch pan with heavy foil; set aside.
  2. For crust, in large mixing bowl, hand beat softened butter with wood spoon then add brown sugar, beating until combined.  Beat in 2 cups flour until crumbly.  Evenly press on bottom of prepared pan.  Bake 20 minutes.
  3. Meanwhile, for filling:  in medium bowl, combine eggs, granulated sugar, remaining 1/2 cup flour, lemon/lime juice, and baking powder.  Beat until well blended.  Remix right before pouring onto hot crust.  Bake 20 minutes more or until edges are browned and center appears set.
  4. Remove to rack, allowing to cool in pan for 1 hour.  Refrigerate, covered, 2 hours.  To serve, lift from pan using foil and cut into bars.
  5. Store, covered, in refrigerator up to 3 days.

Enjoy!


Wednesday
Aug192009

A little sewing.


I'm not the best seamstress in the world and I'm not the worst.  I'd place my sewing skills squarely in the middle--not a novice at all but by no means an expert.  I am self-taught and have found that I'm pretty good at figuring things out.  And I'm loving this current bloggy craft movement where you can find a tutorial online for just about anything.  There are so many projects I want to try!

But last week I didn't attempt anything new.  I made some embellished burpers and a minky blanket for friends to give as gifts to new babies in their families.  I sometimes sell these on Etsy in my "shop" but I haven't listed anything in forever.  Maybe someday....


The burpers are just embellished with quilting cotton and ribbon at the bottom and I add a handcut applique over the machine-embroidered name (I have a small embroidery sewing machine which is fun).  The blanket is so snuggly.  I use super plush dot minky on one side and coordinating quilting cotton on the other.  I have yet to figure out the trick to working with minky!!!  It slips so much--and I even use a walking foot.  It always ends up a bit wonky but I think I'm the only one who can tell.  Please pass along any tips if you have them. 

I hope to do more sewing as the school year picks up.  It's one of my favorite things to do during any down time.  But right now, after the boys are in bed, I am tackling rooms and closets in the house on an organizing mission.  The older boys pretty much wrecked any systems I had in place before summer.  I love that they are getting to be so independent in getting out toys and craft supplies, but sheesh!  It comes at a price.  A messy, stacked-bins-defying-gravity price.  I am saving my craft room for last because it is the room that needs the most work--I let them loose in there to make some cards and now there are bits of this and that everywhere.  I plan to post "after" pictures.  And if I can stomach showing its current blitzed state, I'll even post "before" pictures...but I wouldn't count on it!


Wednesday
Aug122009

The family balancing act.


When I was still working, I remember thinking that when I finally stayed home, I'd have all the time in the world to get things done--so no prioritizing would be needed.  Ha!  Rather, I've discovered that the kitchen is like a diner and the house gets wrecked every few hours instead of just on the weekends (when I was working, the older boys were in daycare so by the time we got home and had dinner, it was time for bedtime routines. The only time the toys came out in mass quantities, really, was on the weekends).  Plus, I'm a bit adrift without my standing Wednesday admin day where I closed my door and ate lunch at my desk and paid all the bills, updated the family calendar, etc.  The truth is, I'm busier than ever even though "I'm home"--and it's kind of shocked me.

For most of us, I think, our goals are to be a great mom and wife (and daughter/sister/friend/neighbor, etc.), keep a nice home, and also take care of ourselves--right?  I used to think that I should do those things only in that order of priority.  And of course, I still think that cultivating my relationship with my family is the most important and that it trumps all of my other duties.  But I've come to realize that I can only do that to the best of my ability when I also take time to work on the other areas of my life.

Flip Flops and Applesauce had a great post the other day where she described those areas as: responsibilities; relationships; rest--and I think she's spot on.  As I have been trying to recast the new balancing act of my stay-at-home self for some time, her post helped me better define things in my mind. My best days are those when I gain at least a little bit in each area.

Because the pantry I'd really, really love to organize again?  I'd feel crummy if I spent three hours to straighten it instead of doing something with the boys.  But I also know my Type-A-self well enough to realize that I'd also feel crummy if I planned all-day outings three days in a row and ignored housework.  I need clean spaces in my home.  I am also the kind of girl who starts checking her pockets like she's forgotten something if I don't work out regularly--it's like, "oh yeah, I didn't forget anything...I just didn't sweat today."  So instead of trying to do it all, my new outlook is to do a little of "it all" each day.  So I'm off to continue practicing this new philosophy--it's been working for me lately (except the admin part.  Still stink at finding time for that.  Just realized "next week's" open house night at Max's school is actually tonight.  Oops--off to find a sitter).  Hope you find balance in your day too! 

 
Monday
Aug102009

Beginner blogging finds.

Although I am in no way qualified to give my own tips on how to add some neat touches to your blog, I can point you to a few resources that I recently discovered and found helpful (from a complete newbie perspective).

Shabby Blogs has some great tips on how to add swanky design elements to your blog, like post dividers, grab buttons--you know, the stuff I don't have yet but want.  Her entry on how to add a signature to your posts, which pointed me here, made creating a personal signature super easy.  So easy, in fact, that now I have one.  Yay for me.

Also, although I've seen information on how to use LinkWithin on blogging platforms such as Wordpress, Blogger, and Typepad, I couldn't find anything on how to use it on Squarespace (which is my platform).  If you are in the same spot, here's what worked for me (you first need to go to LinkWithin and follow their steps to generate and copy the code for their widget) : 

  • Go to your journal page and switch to 'structure' editing mode 
  • Create a page footer
  • Switch to HTML
  • Post the code you copied from LinkWithin there 

Although I do not have much content yet (and so the suggested posts keep repeating), I still think it's a nice feature. 

*I know I'm probably late to the party on these things but in case it saves anyone some time and frustration I thought I'd put it out there.


Sunday
Aug092009

Lolli-flop.


Well, as promised, I made Luxirare's pies-on-a-stick.  Hers looked amazing.  And delicious.  Mine?  Not so much.

I read her post carefully and was very happy to see edits with tips--and follow those tips I did.  But I still could not master a good filling-to-crust ratio (unless you count all the filling that escaped their little pie-pop homes, which I'm pretty sure you cannot).  I used fresh strawberries mixed with homemade jam, a combo that has faithfully worked for me in hand-pies.  Of course now that I stop and think about it, I am not surprised that the filling seeped everywhere when I attempted this here.  The hand-pies I make are rustic and hearty, with a folded side-seam to match, whereas these were supposed to be delicate gems balanced on a stick.  So now I know.

I think when I try again (because they are just too cute to end the story here) I will:  a)  use a thicker filling with cooked fruit (my fresh strawberry chunks were way too big so of course they let off a lot of juice) and b) use a sweeter crust--Martha's Pate Sucree or any other basic sweet crust that does not need to be prebaked should work nicely.  In fact, I'm pretty sure I've already eaten pate sucree straight up and thought to myself, "fruit?  Who needs fruit with this"--just in case my ratio is off yet again and I'm left with a dough-pop. 

Good luck if you give it a go--and I sure hope you do--and please, please pass along your tips and triumphs.  It obviously can be done and in fact done quite well, as Luxirare shows on her blog so beautifully.  Go there to be inspired.  Look below to be amused. 


Cheers,

Thursday
Aug062009

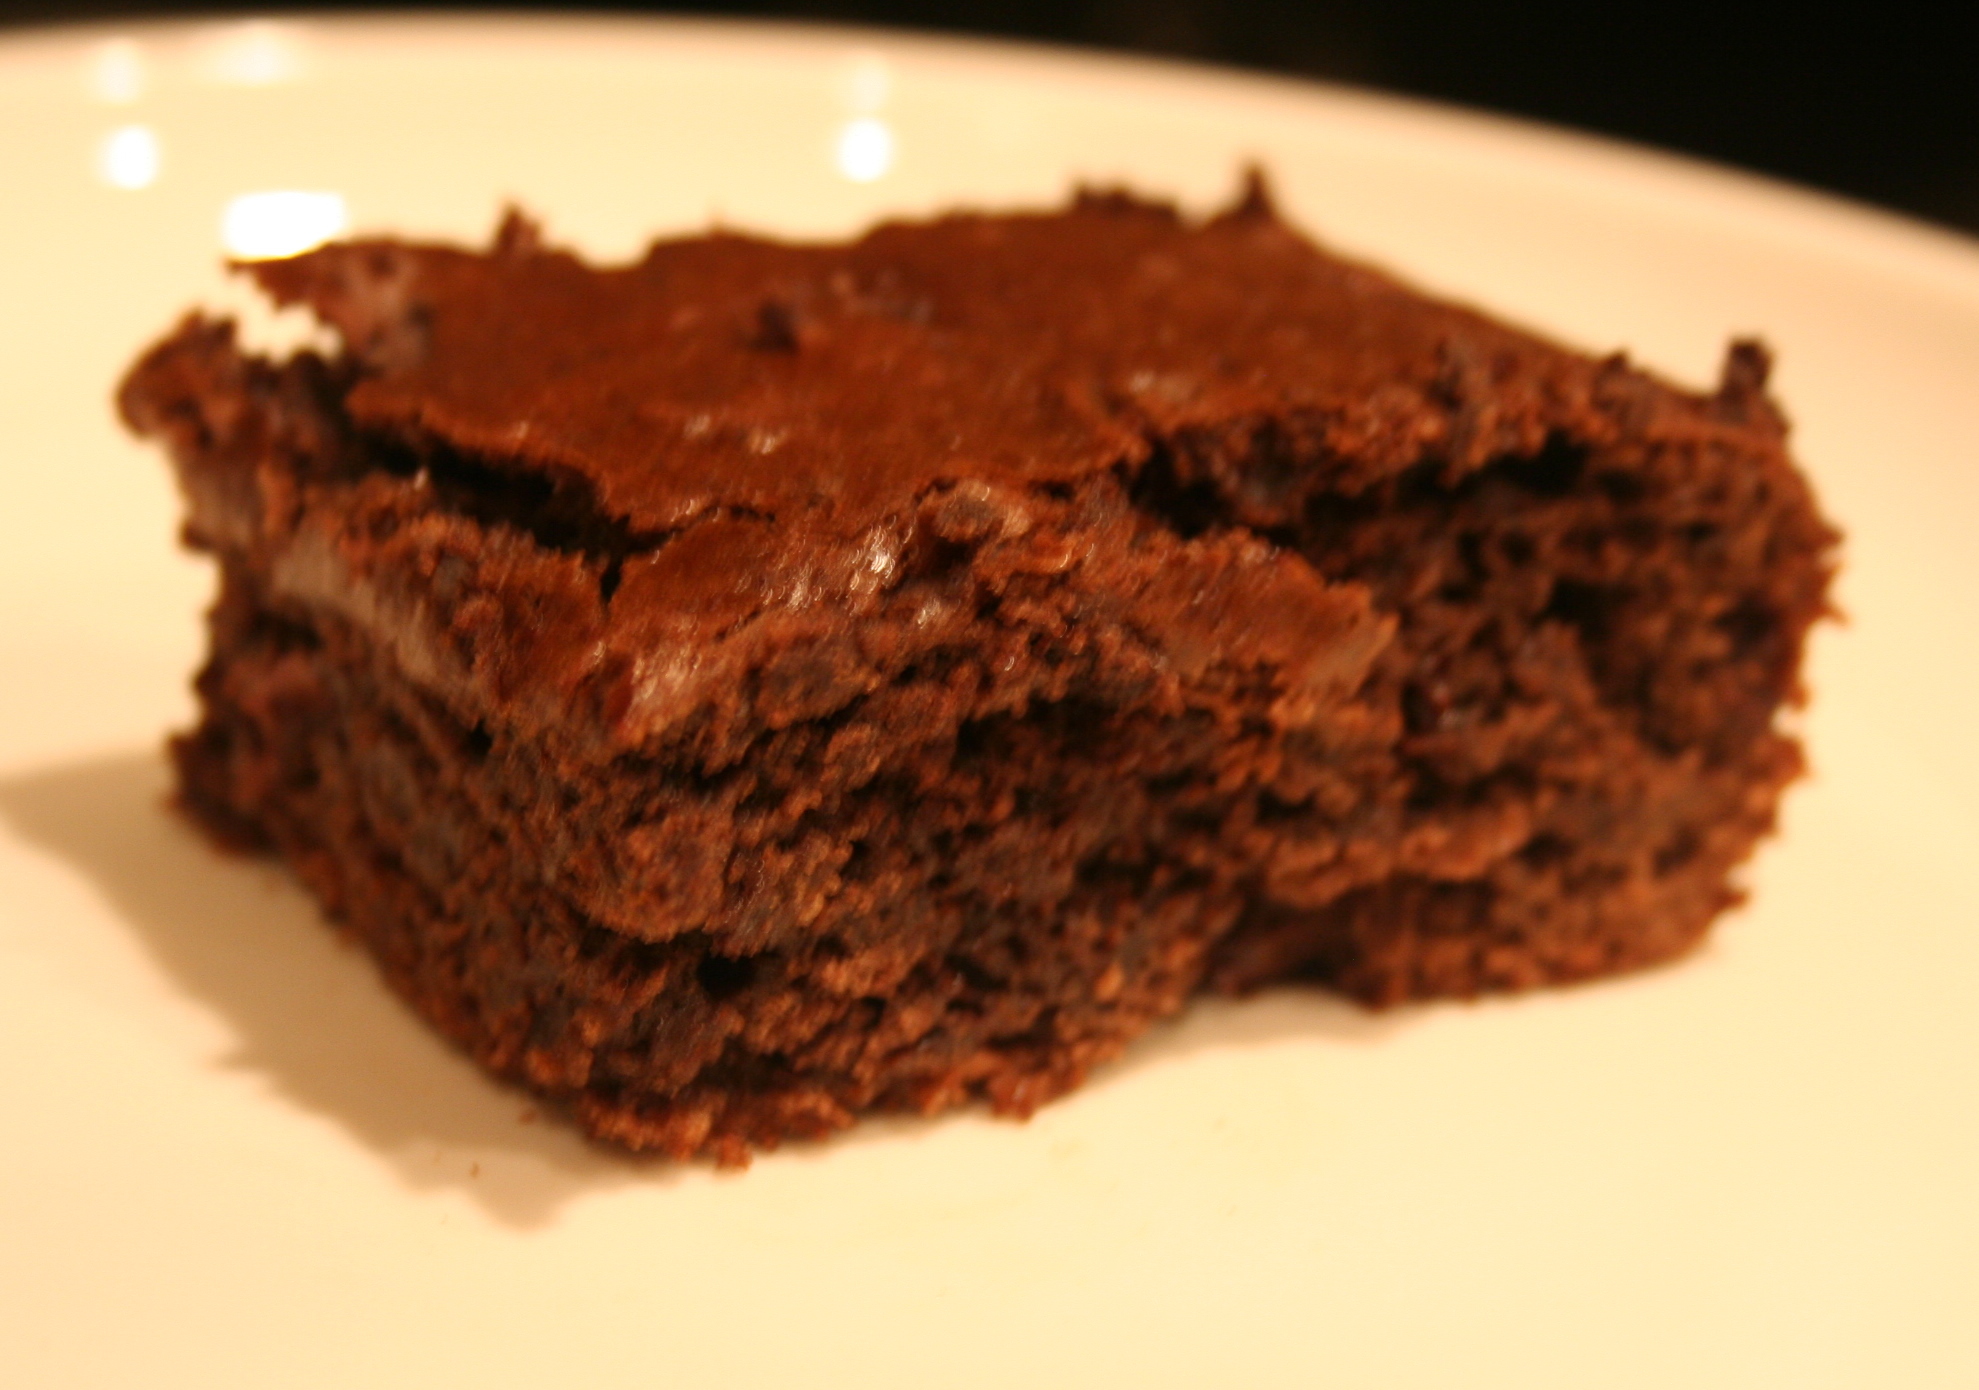
Beach Brownies.

When we go away for vacation, we prefer renting a house for the extra elbow room. But quite often, we end up sacrificing space for location, cramming the five of us into some tight quarters just to be able to walk to the beach.

These, shall we say, "quaint" accommodations usually have an efficiency-style kitchen without a full sized fridge.  This is otherwise known as my worst nightmare as I still like to cook while away.  And to make it crazier, I also like to bake on vacation.  I can’t help it and yes, I know I need help.

Since Max has been such a trooper this week as he adjusts to first grade, I decided to bake something for him that might remind him of our summer trips.  It’s one of those so-called cheater recipes that start with a box mix, something I call Beach Brownies.  I like it because there are just 3 main ingredients, so you don’t have to fool around with eggs or oil or any of that other nonsense that won't fit in the mini fridge anyway.  As a side note, I feel the need to go on record saying I don’t have a huge thing, either for or against, box mixes (though I do know that some folks swear by them while just as many turn their noses waaay up at them).  Me?  I'm sort of like, meh.  Obviously, they are great for the convenience factor but because I try to avoid preservatives when possible, I make up a big batch of my own “mix” to store in the fridge and use for all of my quickie recipes when I’m home.  But that won't work on vacation so I don't hesitate to use a box mix.

The true beauty of this recipe is that you can play around with the flavors.  Below is the brownie version.  It produces a moist, slightly cakey, brownie that gets fudgier as it sits.  I think they're perfect for packing in picnic lunches because they don't disintegrate into melted chocolate goo.  Another variation we like is using a yellow cake mix and lemon flavored pudding.

Beach Brownies

  • 1 (3.4 ounce) package instant chocolate pudding mix
  • milk, amount as indicated in pudding directions
  • 1 (18 ounce) box chocolate cake mix
  • 1-2 cups semi-sweet chocolate chips or other mix-in (optional)

Directions

  1. Prepare pudding according to package directions.
  2. Stir in cake mix, careful not to overbeat or incorporate too much air.
  3. Stir in chocolate chips or other mix-in.
  4. Pour into a greased 13x9 baking pan.
  5. Bake at 350 degrees F. for 30 to 35 minutes or until the top springs back when lightly touched.
  6. Chow down.