Shop Duck Duck Wool

Where was that?
Updates

Enter your email address:

Delivered by FeedBurner

Look around
Pumpkins One, Two, and Three (and Me)

when I started the blog...

and a few years in...

and now...

3pumpkinslittle on Instagram 


Entries in Halloween (16)

Sunday
Oct252009

Halloween treats.

During the week leading up to Halloween, I usually like to make some fun treats for the boys.  I'm a bit behind this year because of our recent trip so I have yet to make anything truly special.  But since I wasn't blogging in 2008, I thought I'd post some pictures of what we did last year.

For our neighborhood pumpkin carving party, I made haunted pumpkin patch and spider web cupcakes.

And because Leo was in his preschool's owl class last year, I also made some owl cupcakes (got this one from my trusty Hello Cupcake book).

I displayed the cupcakes on a fun stand I picked up from the craft store.  The stand was cute but also nothing but trouble to assemble, so I recommend you pass on it should you see it this year.  

For a playdate treat, I made Bakerella's cake pops (btw, did you see that proposal on Bakerella??  I was dying over it). 

The cupcake pops are on my short list again for this year--the boys just love them--but as they take quite some time to make, they may get cut and we'll instead make Martha's monster pops (found via one of One Pretty Thing's Halloween Food roundup).  I think a 'build your own monster pop' activity would be very well received. 
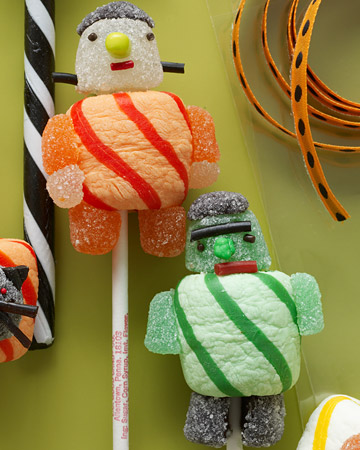
We'll see what I come up with. 

Thursday
Oct152009

Applesauce jack o'lantern favor tutorial.

Our youngest started in a nursery class this year and his group plans to have a small Halloween party, so I needed another non-candy favor idea.  It's not as if Will hasn't tried candy--please, he's the third--but at least I can say it's on a rare occasion.  The older boys know to go into stealth mode (hide in pantry) when they're eating a piece.

I came up with applesauce jack o'lanterns and if you'd like to make some, too, you will need:

  • 2 applesauce cups (per favor)
  • tape
  • scissors
  • orange crepe paper
  • black electrical tape

Directions

Tape applesauce cups together to form pumpkin shape.

Wrap crepe paper around a few times, just to help with coverage.  Tape.

Fold crepe paper in half (better coverage, better scale) and wind around and around, turning as you go, until the cups are completely wrapped.  Tape.

Cut cute (we went for non-scary) jack o'lantern face shapes out of electrical tape.  Stick on.  Tie on a note if you like.  Get these done ahead of time and cross something off your to-do list.


Wednesday
Oct142009

Switch Witch to the rescue (with download).


A few years ago a friend passed on a great tip on how to manage all of the candy that your kids haul in from trick or treating.

Enter the Switch Witch.

Switch Witch is a very kind witch (we don't like things too dark or scary here) who comes by after Halloween to take away extra candy and instead leaves a more sensible goodie.  The beauty of the Switch Witch is you get to decide everything about her.  Unlike the Easter Bunny, the Tooth Fairy, etc., your kids have probably never heard of her, which is awesome!  Because it means you are not hemmed in by any preconceived notions or expectations--how fantastic, right?  It's fun to make your own tradition.  Here's what we do.

The boys come in after a fun night of trick or treating, their bags holding an impossible amount of candy.  We dump and check the loot and they get to eat a few pieces on the spot.  Then we take out some reasonable-sized containers (we decorate empty plastic peanut butter jars) and they fill them with whatever candy they choose (to be consumed later per some house rules).  I try not to candy-shame them into picking what I consider the "good stuff"--but it's hard (because in what universe does a roll of Smarties trump any candy made with real chocolate?).

The rest of the candy is set out for the Switch Witch, who takes the candy and leaves a non-candy treat.  In years past we've done books or small toys.  This year I found some nifty rotating toothbrushes that the boys wanted--I figured a toothbrush "toy" would be a perfect switch for candy!

It wasn't until last year that either of the boys asked what happened to all of the candy.  I told them she takes it to others to share (I left out that the "others" were my then-officemates).  This year the loot is headed to my husband's office. 

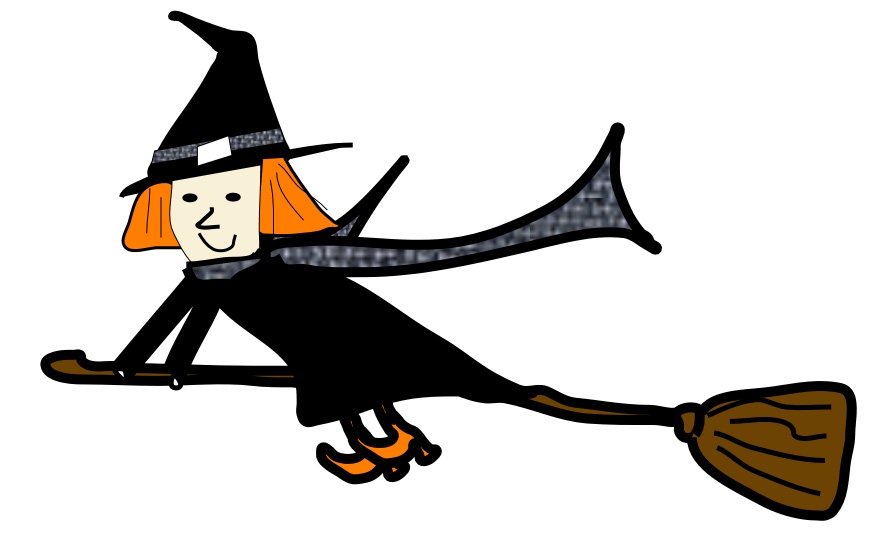
Here is a printable I made up--we like the Switch Witch to leave a little note.  I tried to make her look like a funny, happy, witch, not to mention sensible--she never forgets her scarf because it's chilly whizzing about on a broom.  I have no idea what I'm doing with graphic software, but it'll work for our family.  Be sure to check out other tips at We Are THAT Family's Works for me Wednesday.

Tuesday
Oct132009

Mummy flashlight tutorial.

I've had this idea since last year when we saw inexpensive flashlights at Ikea (I think they were 50 cents).  My boys love flashlights, especially when they are trick or treating.  So instead of giving out candy favors at our Halloween celebration, I thought we'd give out flashlights.  I of course also wanted them to look cute--so like everything else around here during Halloween, they got the mummy treatment (we're talking stuffed animals, furniture legs, me if I stand still long enough...).

You will need a small, inexpensive flashlight, white crepe paper, tape, and a black marker.  I haven't made it back to Ikea to see if they have the bargain flashlights again this year, but I found this one at our Dollar Tree (I also picked up some batteries there.  I definitely recommend having the flashlights ready to go to avoid the buzz kill factor).  

Wrap the flashlight a couple of times with the crepe paper lengthways and tape to secure.

 Fold the crepe paper in half and wrap the flashlight completely.         

After securely taping, dot on a couple of eyes with a marker (I think googley eyes would be great here but I didn't have any on hand).  Add a note and there you go--a practical, yet fun, Halloween favor that both kids and parents will appreciate. 

For more DIY ideas, be sure to check out today's DIY Day at Kimba's A Soft Place to Land.  And also be sure to check back here for another sugarless Halloween favor idea.  It's geared to the under-two set and I hope to post it tomorrow. 

Wednesday
Oct072009

Halloween treat bag tutorial.

I was in the craft store a few days ago and saw a kit from Martha's line for cute favor bags.  They were designed to look like witch brooms and I thought they were adorable.  But I didn't want to spend any money on them since I knew I could do the same thing with items I already had at home.

Here's what you will need (per treat bag) if you'd like to make some, too:

  • 2 brown paper bags
  • straight edge
  • exacto knife and cutting surface
  • twine
  • twig*

Directions:  

Flatten one of the bags.  The picture below isn't the best because I didn't take one with the sides smoothed out.  Basically, you want two layers to cut through so push out the sides and flatten.

Leaving about a two inch border of the bag uncut at the top and bottom, cut lines through both layers in the center portion.  No need to be too exact, it's a witch's broom after all. 

Place your goodies in the uncut bag and place within the cut bag. 

Shmoosh down a bit and gather both bags at the top.  Insert your twig* and tie with twine. 

I think these will be perfect to package our Halloween cutout cookies this year.  I'll use the sugar cookie recipe and frosting technique I posted about here.
*If I were making these for children, I'd probably use a pretzel rod in lieu of a twig (maybe a cellophane wrapped chocolate-dipped pretzel rod, hmm...).  Generally speaking, I'm against equipping children with a pointy, small, stick.  Especially when they're in a group.  And sugar is in their near future.  I'm just saying...
Monday
Oct052009

Ma'am. Step away from the contact paper.


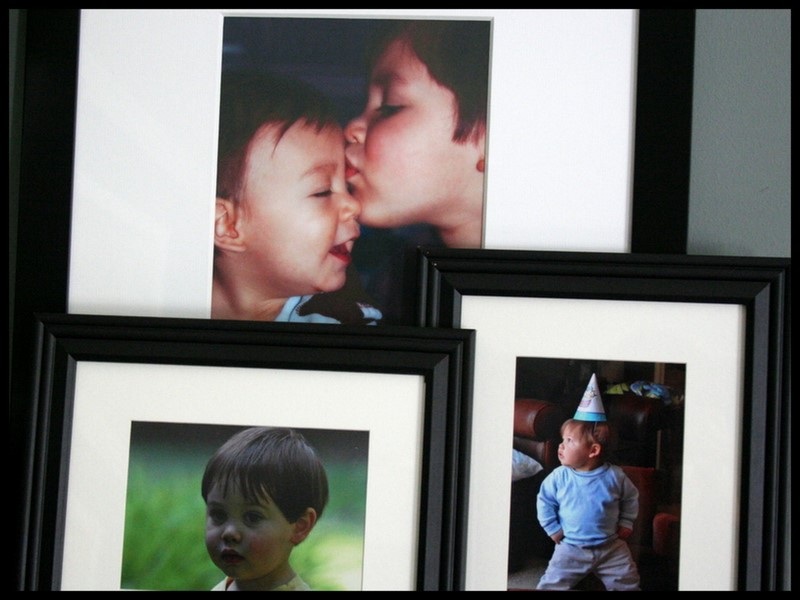
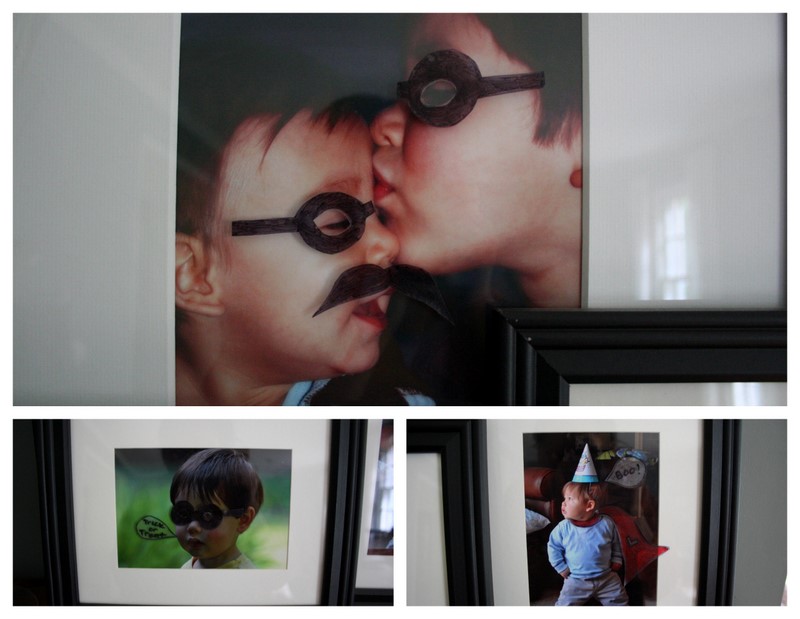
Could someone please, please, come over here and put away this roll of vinyl?  I really do have some other stuff to get to.  But I couldn't help myself yesterday when I started decorating for Halloween and decided that our pictures looked a little out of place.

So I held up a sheet of acetate over the pictures to get a sense of scale.  And I drew a mustache here, a cape there...a few masks.  Then I traced everything onto contact paper (excuse the drawings--18 month-old on lap while attempting). 

I topped them with another sheet of vinyl and did some trimming and some sticking (more on Con-Tact paper crafts here and here).  Now the pictures are ready for Halloween.  

I saw a clever post last year where you use a grease pencil to embellish your pictures.  That was my original plan.  But then I realized that drawing directly onto my picture glass would absolutely guarantee a 30 minute Windex frenzy right before guests arrived for Thanksgiving dinner.  So this works for me--after Halloween, I can just peel off the cut outs.

More Halloween stuff coming up--Happy Monday!

Page 1 2