Shop Duck Duck Wool

Where was that?
Updates

Enter your email address:

Delivered by FeedBurner

Look around
Pumpkins One, Two, and Three (and Me)

when I started the blog...

and a few years in...

and now...

3pumpkinslittle on Instagram 

  
Wednesday
Oct282009

Works for me Wednesday, muffins.


I like to have fresh muffins on hand, but sometimes I'm not up to hauling out all of the ingredients.  Here's what works for me to make it a little easier.

At the beginning of each month, I make up four baggies of muffin mix and store them in the freezer (you probably don't need to put them in the freezer but I do).  I use a standard recipe that can be tweaked by a variety of mix-ins.  Throughout the month I just grab a baggie, add in the "wet" ingredients and whatever mix-ins I happen to have, then suddenly fresh muffins are ready for the taking in no time at all.  In fact, hold on, I'll be right back.  See?  Just made some muffins (pineapple coconut because that's what was in the pantry).

Here's the recipe I use.  I set up an assembly line, laying out four quart-sized baggies into bowls (so they'll stand up), then measure and dump the dry ingredients into each one.  Do not add the "wet" ingredients!

Old-School Muffins

from Alton Brown

dry ingredients (for each bag)

  • 2 1/4 Cups all-purpose flour
  • 2 tsp baking powder
  • 1 tsp baking soda
  • pinch of salt

"Wet" ingredients--to be added later!

  • 1/2 cup sugar
  • 1/2 cup vegetable oil
  • 1 large whole egg
  • 1 egg yolk
  • 1 cup plain yogurt (I've also used sour cream if my mix in is sweeter)

Extras

1 to 2 cups nuts, berries, chocolate chips, or any combo.  Do not do more than 1 cup of chocolate chips though.

To assemble:

Preheat oven to 375 degrees.  Prep muffin tin with baker's joy spray or muffin liners.  Dump dry "mix" into bowl, whisk several times to fluff up (Alton says to pulse in a food processor for 5 seconds but I don't bother).  In separate bowl, whisk together all wet ingredients.  Dump wet ingredients onto dry, add in mix-ins, then stir until batter comes together.  Do not mix smooth. 

Drop batter into prepared tin.  Cups should be full (at this point, you can store uncooked muffins, loosely covered, in the fridge if you want to bake them up the next morning.  You could also store them in the bowl but do not stir everything up again before you pan them--you'll let out all the bubbles in the batter and you won't get all those awesome muffin-y nooks and crannies).

Bake for 18-20 minutes.  Remove from oven and immediately place muffins on cooling rack or turn them onto their sides to let steam escape, preventing the dreaded mushy muffin bottom.

Store in an airtight container for up to a week.

A few more notes:  I put all of my quart-sized baggies into a gallon-sized ziploc before I toss them into the freezer.  It keeps them together so I know how many I have left.  Plus, when I empty a baggie, I just stick it back into the gallon ziploc to reuse several times to minimize waste. 

Be sure to check out more "works for me Wednesday" tips over at We are THAT Family.


Monday
Oct262009

If you wait until the last minute, it only takes a minute.


Back when I was practicing appellate law, a dear co-worker and I adopted the title of this post as an unofficial office slogan.  We were so busy that on any given day, we could only deal with the most urgent of deadlines.  I find myself in a similar boat these days.

Last year, Max was sick the entire week before Halloween.  It turned out to be bronchitis.  It was almost serious enough to keep him in for trick or treating, but luckily, he started feeling better and made it out.  I am 85% sure he was not faking it. 

He asked to be a wizard and I had every intention of finding a pattern and sewing a proper costume for him.  But caring for him that week was full-time, especially as we were constantly on guard, attempting to keep his brothers healthy (but of course Leo still got sick).

It was not until the night before Halloween that I found time to try to whip up a wizard costume (and no, the irony that I had to conjure up something was not lost on me).  I already had the fabric but no pattern.  Below is what I did and it worked well enough.  It is certainly not the best constructed garment I've ever made--in fact, it's probably one of the worst--but it was quick and easy and put a smile on my little one's face, a rare sight indeed that week.

In case you are in similar desperate straits (and I sure hope you're not), here is an extremely rudimentary guide to how I made a wizard frock in about 30 minutes.  Ours went over the head but you could also cut it up the front to make it more robe like.


I used a satin costuming fabric that was fairly difficult to work with, especially the neckline as it kept slipping (I double folded it).  To really save time, I recommend using a fabric that will not fray, such as fleece or jersey, so you wouldn't have to bother with hemming. 

As for Leo, he had told us for weeks that he wanted to be an astronaut and the plan was to use Max's costume from the previous year.  But the night before the harvest parade at his school, he decided he wanted to be a lion.  He really wanted to be a lion.

And I have a problem saying no. 

Again, I attempted this with no pattern--what is wrong with me??  I used a pair of his footed pajamas as a guide.  I'm sorry I can't diagram it because it was pretty nightmarish and I've blocked it from memory.  At least the parade was a few days before Halloween, so in my book, I was done "early."   I used fleece, which I love because it is so forgiving.

So after last year's stressfest getting their costumes done, you would think I learned my lesson and finished their costumes early this year, right?  Perhaps before we left for Disney?  Wrong.  Guess what I'll be doing after bedtime this week? 

I'm participating in A Soft Place to Land's DIY day.  Be sure to check out all the other projects--I always get so many ideas from there!


Monday
Oct262009

Muffin tin Monday.


Muffin Tin Monday at Her Cup Overfloweth

The theme this week for Muffin Tin Monday is Fall Harvest/Halloween.  Couldn't pass that up!  Here is Leo's last-minute tin. 

A peanut butter and jelly bat and a turkey and cheese ghost; trail mix; carrot and cheese cubes; and milk in a jack o'lantern cup.  I found the spider plates marked down at Target last year the day after Halloween.  They were only a dollar so I picked up ten or so to use the entire month of October.  The peeps were in a Halloween care package sent to the boys by their sweet grandmother in Ohio--she also sent matching Halloween jammies! 

Leo does not care for the peeps but he thinks they are cute so we use them for decoration.  Side note:  ever put a peep into hot chocolate?  We were out of marshmallows so I thought, "why not?"  Well, take it from me--don't do it, yuck!

Be sure to check out all of the other muffin tins from this week over at Her Cup Overfloweth

Sunday
Oct252009

Halloween treats.

During the week leading up to Halloween, I usually like to make some fun treats for the boys.  I'm a bit behind this year because of our recent trip so I have yet to make anything truly special.  But since I wasn't blogging in 2008, I thought I'd post some pictures of what we did last year.

For our neighborhood pumpkin carving party, I made haunted pumpkin patch and spider web cupcakes.

And because Leo was in his preschool's owl class last year, I also made some owl cupcakes (got this one from my trusty Hello Cupcake book).

I displayed the cupcakes on a fun stand I picked up from the craft store.  The stand was cute but also nothing but trouble to assemble, so I recommend you pass on it should you see it this year.  

For a playdate treat, I made Bakerella's cake pops (btw, did you see that proposal on Bakerella??  I was dying over it). 

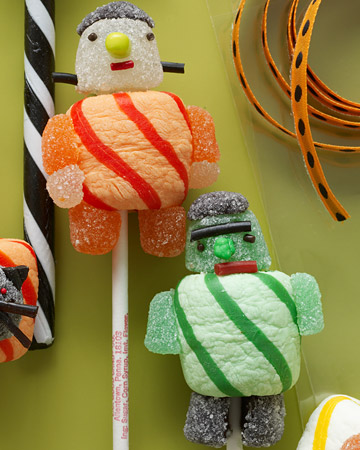
The cupcake pops are on my short list again for this year--the boys just love them--but as they take quite some time to make, they may get cut and we'll instead make Martha's monster pops (found via one of One Pretty Thing's Halloween Food roundup).  I think a 'build your own monster pop' activity would be very well received. 

We'll see what I come up with. 

Friday
Oct232009

Back home.

We are back.  And I cannot believe how tired I am.  Five nights, six days of Disney.  I will no doubt put together a post of some highlights.  But not yet.  Because right now I need a day or two of just being back home in a Disney-free space.

We got in late last night.  And before we left, I offered to help out a friend's brother with their wedding flowers.  Their wedding is tomorrow, so I put together some bouquets and other personal flowers this morning. 

The friend is Max's former kindergarten teacher.  We have really lucked out with teachers at Max's school.  His current 1st grade teacher is amazing.  She has a blog for the parents and posts regularly on everything that the kids do--she even includes short video clips and pictures.  It's really incredible.  And Max happens to have made good friends with a lovely girl whose mother is also a first grade teacher at their school.  They have benevolently taken him under their wing several times for outings and other fun activities (like staying and playing in her empty classroom after school which Max thinks is the coolest thing).  And of course, Max's first crush, his kindergarten teacher.  We are extremely lucky that she still treats him like one of "her kids" even though he's moved on from kindergarten and she has a new batch of students. 

Last year, Max's kindergarten teacher really helped him develop a love for school.  So how does one go about repaying someone for such a gift?  Well, you can't.  But you can at least try, say, with a bridal bouquet for her soon-to-be sister-in-law.

The couple chose a palette that is more typical in spring and summer weddings--cool blue, lavender and purple, with touches of magenta.  The picture they showed me had spring foliage, such as hyacinth and  fiddlehead ferns, so I had to adapt their dream flowers to a fall interpretation.  I went with hydrangea, delphinium, privet berry, veronica, and freesia. 

For bridesmaid bouquets, I added in Peruvian lilies (alstromeria) and switched the magenta freesia to white.  I used coordinating flowers for the boutonnieres and corsages.  To make the groom's boutonniere stand out, I added a sprig of hydrangea.

After this gig on the heels of our trip, it's safe to say you could poke me with a fork.  But "done" is relative as I have two suitcases of laundry and an empty fridge calling my name.  And since I've been out of the kitchen for a week, I also have dough proofing and a ton of cooking to catch up on.  Then there's the three Halloween costumes to finish.  But at least I don't have to stand in line to tackle any of these.  It's good to be home.  Happy Friday!

p.s.  I was super excited to return to find that my post on the Switch Witch was featured on Tip Junkie.  I love that site!!

p.p.s.  I was not excited to return to find that none of my auto posts posted.  I suppose turning them on would've helped.  A second craft along give away as well as more Halloween crafts were supposed to post--I'll get them up asap so be sure to check back.

Friday
Oct162009

Happy Friday and random finds.

Tomorrow we're headed to Disney for a week while Max's year-round school is on break.  It's the first time we've gone so we're pretty excited.  And overwhelmed. 

Hopefully my auto-posts will work!  Here are some fun links that caught my eye this week.

  • I plan to redo Will's room very soon and want to make a full set of alphabet cards.  I really like the animal series on Dafont, downloadable for free here.  I can also see using these for appliques. 

  •  I'm thinking about a project that would need chalkboard paint in a custom color.  DIY directions found on Craft at Home, here.
  • I just signed up for two free samples of Teasta tea.  Details here.

Back to packing.   Happy Friday!


Thursday
Oct152009

Applesauce jack o'lantern favor tutorial.

Our youngest started in a nursery class this year and his group plans to have a small Halloween party, so I needed another non-candy favor idea.  It's not as if Will hasn't tried candy--please, he's the third--but at least I can say it's on a rare occasion.  The older boys know to go into stealth mode (hide in pantry) when they're eating a piece.

I came up with applesauce jack o'lanterns and if you'd like to make some, too, you will need:

  • 2 applesauce cups (per favor)
  • tape
  • scissors
  • orange crepe paper
  • black electrical tape

Directions

Tape applesauce cups together to form pumpkin shape.

Wrap crepe paper around a few times, just to help with coverage.  Tape.

Fold crepe paper in half (better coverage, better scale) and wind around and around, turning as you go, until the cups are completely wrapped.  Tape.

Cut cute (we went for non-scary) jack o'lantern face shapes out of electrical tape.  Stick on.  Tie on a note if you like.  Get these done ahead of time and cross something off your to-do list.


Wednesday
Oct142009

Switch Witch to the rescue (with download).


A few years ago a friend passed on a great tip on how to manage all of the candy that your kids haul in from trick or treating.

Enter the Switch Witch.

Switch Witch is a very kind witch (we don't like things too dark or scary here) who comes by after Halloween to take away extra candy and instead leaves a more sensible goodie.  The beauty of the Switch Witch is you get to decide everything about her.  Unlike the Easter Bunny, the Tooth Fairy, etc., your kids have probably never heard of her, which is awesome!  Because it means you are not hemmed in by any preconceived notions or expectations--how fantastic, right?  It's fun to make your own tradition.  Here's what we do.

The boys come in after a fun night of trick or treating, their bags holding an impossible amount of candy.  We dump and check the loot and they get to eat a few pieces on the spot.  Then we take out some reasonable-sized containers (we decorate empty plastic peanut butter jars) and they fill them with whatever candy they choose (to be consumed later per some house rules).  I try not to candy-shame them into picking what I consider the "good stuff"--but it's hard (because in what universe does a roll of Smarties trump any candy made with real chocolate?).

The rest of the candy is set out for the Switch Witch, who takes the candy and leaves a non-candy treat.  In years past we've done books or small toys.  This year I found some nifty rotating toothbrushes that the boys wanted--I figured a toothbrush "toy" would be a perfect switch for candy!

It wasn't until last year that either of the boys asked what happened to all of the candy.  I told them she takes it to others to share (I left out that the "others" were my then-officemates).  This year the loot is headed to my husband's office. 

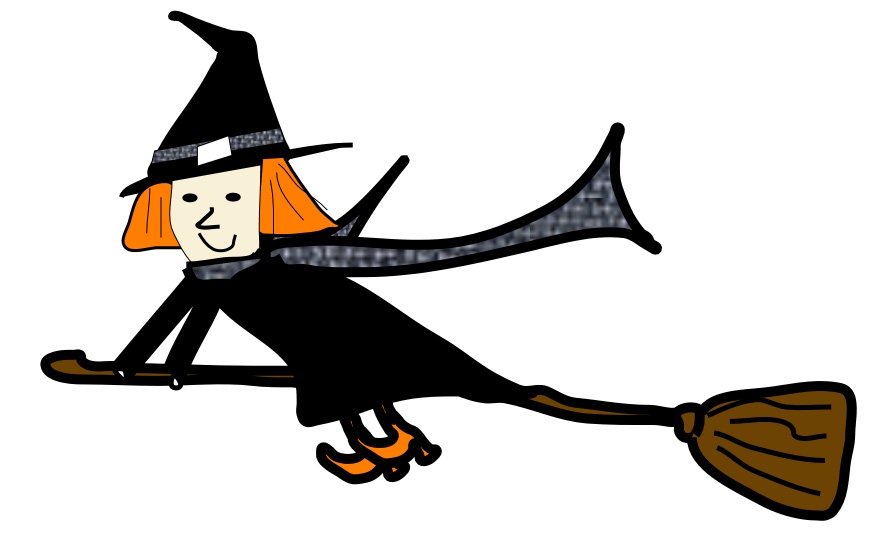
Here is a printable I made up--we like the Switch Witch to leave a little note.  I tried to make her look like a funny, happy, witch, not to mention sensible--she never forgets her scarf because it's chilly whizzing about on a broom.  I have no idea what I'm doing with graphic software, but it'll work for our family.  Be sure to check out other tips at We Are THAT Family's Works for me Wednesday.

Tuesday
Oct132009

Mummy flashlight tutorial.

I've had this idea since last year when we saw inexpensive flashlights at Ikea (I think they were 50 cents).  My boys love flashlights, especially when they are trick or treating.  So instead of giving out candy favors at our Halloween celebration, I thought we'd give out flashlights.  I of course also wanted them to look cute--so like everything else around here during Halloween, they got the mummy treatment (we're talking stuffed animals, furniture legs, me if I stand still long enough...).

You will need a small, inexpensive flashlight, white crepe paper, tape, and a black marker.  I haven't made it back to Ikea to see if they have the bargain flashlights again this year, but I found this one at our Dollar Tree (I also picked up some batteries there.  I definitely recommend having the flashlights ready to go to avoid the buzz kill factor).  

Wrap the flashlight a couple of times with the crepe paper lengthways and tape to secure.

 Fold the crepe paper in half and wrap the flashlight completely.         

After securely taping, dot on a couple of eyes with a marker (I think googley eyes would be great here but I didn't have any on hand).  Add a note and there you go--a practical, yet fun, Halloween favor that both kids and parents will appreciate. 

For more DIY ideas, be sure to check out today's DIY Day at Kimba's A Soft Place to Land.  And also be sure to check back here for another sugarless Halloween favor idea.  It's geared to the under-two set and I hope to post it tomorrow. 

Sunday
Oct112009

Site news.

Well looks like my little blog is playing Halloween tricks on me.  Pictures are not where they are supposed to be and I'm not sure why.  It's sort of like pictures in Harry Potter and they are visiting each other in different posts.  We're off to a wedding so I have no time to tinker now.  If you're visiting from One Pretty Thing (hello!) please pardon...